Polishing is the final step of working any stone. While it often seems an afterthought, nothing could be further from the truth. The difference between a perfect polish and a passable one is huge, and most of us want to make the most out of each bit of stone.
So, let’s talk a bit about the best lapidary polishing compounds, and how to use them to get the finish your stones deserve.
- How To Polish Rocks With Sandpaper (Step-by-Step Guide)
- How To Polish Petrified Wood Without a Tumbler (Step-By-Step Guide)
Top Lapidary Polishing Compounds
The following compounds will all serve you well, depending on the stone you’re working with. It’s not a bad idea to have all of them available if you’re working on a variety of different stones.
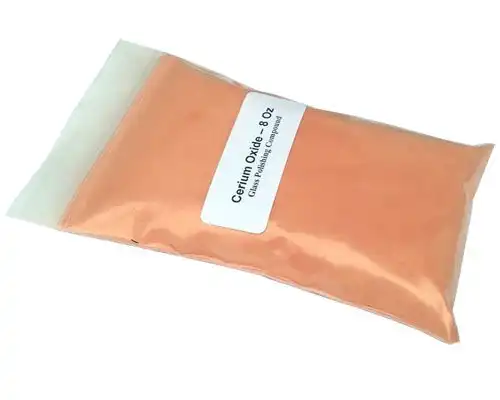
1. Cerium Oxide – The Go-to Polishing Compound
Cerium oxide is readily available, easy to use, and handles the majority of stones very well. It’s almost always bought as a powder, however, which means you’ll need to mix it with water to form a paste that will let you polish.
If you don’t know what you’ll be working on… I recommend this as the first polish you pick up. Cerium oxide is used commercially to polish glass, in addition to lapidary use. That’s a good hint as to just how powerful it is.
The only downside is that you have to make a paste with it. This makes a lot more of a mess than when you’re using hard polishes. It’s also not suitable for corundum and other very hard stones.
Bottom line is that cerium oxide is the best polishing compound to start with for a lapidary. It works great, it’s dirt cheap, and it will leave most stones with a great luster.
Pros
- Cheap and readily available
- Useful for the majority of stones
- Works with most tool types
Cons
- Doesn’t work on corundum and other very hard minerals
- Requires you to make a paste
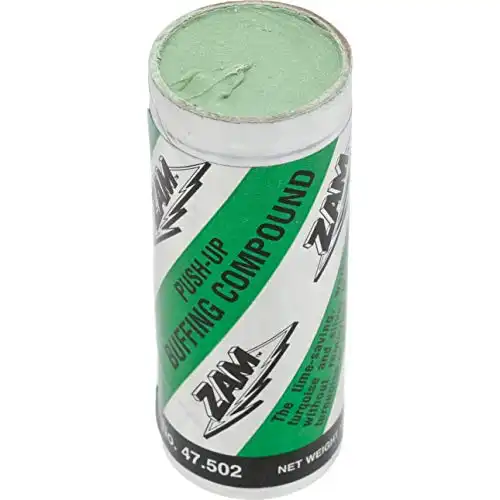
2. Zam – Perfect for Soft Stones, Essential for Jewelers
If you’ve been following us… you know I like Zam. It’s fantastic for opal, turquoise, and other softer stones. It’s also friendly to silver and gold, which are important considerations for those who plan to set their treasures at the end of their journey.
Zam is a hard polish, a bunch of chrome and tin oxide wrapped in a binding wax. This makes it easy to use and keeps it from making a huge mess as you’ll sometimes get with powder-type polishes after they’re made into a paste.
The downside is that it’s not suitable for harder stones in most cases. It will polish agate or jasper, but it takes a longer time than most of us want to spend.
Zam provides a great polish on soft stones and still works on harder ones. It’s dual-use as well, and makes one of the best polishing compounds for silver and gold.
Pros
- Dual-use for jewelry, since it works great on silver and stones
- Hard polish is easy to deal with
- Works very well for opal, turquoise, and other soft but valuable stones
Cons
- Very slow to work on harder stones
- Usually requires power tools
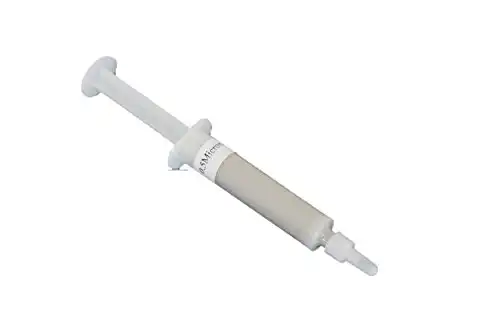
3. 50k Diamond Paste – For the Hardest Stones
Diamond pastes are actually their own subject but the above link is a good polishing paste for those working with corundum and other harder materials. Flat laps are often used entirely with diamond paste, but it’s a bit harder to use with most tools.
Diamond pastes come in grits up to 200k, much finer than any other abrasive. That doesn’t mean it’s the best, but it’s definitely useful when you’re working with hard materials. Diamond pastes also work well for agate and jasper.
Diamond paste is the most expensive option by a long shot when you look at per-piece pricing. A tube of
Diamond pastes work very well for high-hardness stones, but they’re not the best choice for all uses. For the hardest stones, however, there is no substitute.
Pros
- Best compound for stones over 8.0 Moh’s scale
- Easier to use than powders
- Incredible compound for flat laps
Cons
- A bit expensive per piece
- Not the best compound for rotary tools or cloth wheels
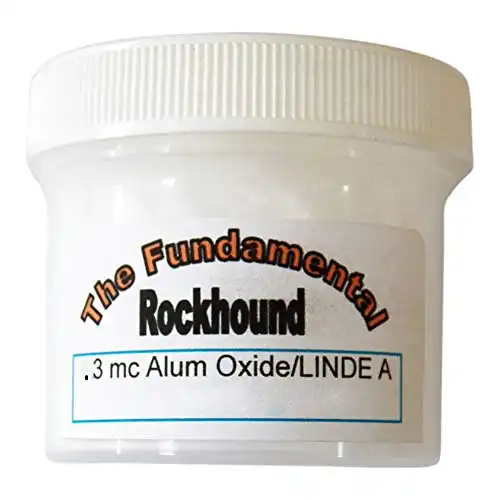
4. Linde A – Situational and Indispensable
Linde A is the old brand name for .3 micron aluminum oxide. It’s a great polish, but it’s slow to work as .3 micron is just a touch under 100k grit. It works well for anything softer than corundum, but my main use for it is situational.
Namely, Linde A seems to work when nothing else will for stones that like to undercut during final polishing. Undercutting is a pain to deal with, and when its happening during the final polish it can be downright infuriating.
The only problem with the stuff is that the polish is very fine so it takes a lot of time to work compared to most compounds. It’s often used for optical lenses and cab-cutting competitions, but it’s a touch too high for real commercial use. It’s also quite expensive compared to other compounds.
Linde A’s main strength is that it prevents undercutting most of the time. It’s also great for final show polishes, but it’s a bit much for the majority of lapidary applications.
Pros
- Prevents undercutting
- Ultra-high grit
- Provides a very fine polish when used properly
Cons
- Cost per piece is fairly high
- Rather slow to work with
How to Pick a Lapidary Polishing Compound
Polishing compounds are a heated subject among lapidaries. Everyone seems to have their own method for sanding and polishing, with just enough overlap that heated arguments can emerge. The best polish is the one that you can use the best, but if you’re working with a variety of stones things can quickly get confusing.
The following guidelines will help you pick the right polish, but most people will end up with multiple types in their workshop.
I do want to be clear on one thing: if your polish is hard enough to affect the stone you’re working with then your skill matters more than the polish in 99.999% of cases. When you hear people arguing about fine-tuning their polish usage it’s generally folks with years of experience talking about differences in the finish that most people won’t notice.
The Intended Stone
The stone that you’re planning to work is the most important consideration.
Cerium oxide is incredible for working with agate or jasper, but it doesn’t do much to any kind of corundum for instance. You need to suit things to the stone that you’re working with, but you also have to take into account the tools you have available.
As far as general rules, the following should help:
- Zam/Chrome Oxide- Opal, turquoise, chrysocolla, and other softer gemstones will all receive a great polish from these compounds. Moh’s scale of 3.5-5.5 are served best.
- Cerium Oxide- Agate, jasper, chalcedony, quartz, and other hard stones will benefit most from cerium oxide. Roughly 5.5-8.0 are served well by this polish.
- Diamond Paste- Usable for a final finish on all stones at higher grits. Required for corundum or any other stone which is over 8.0 on the Moh’s scale.
Those guidelines should help you pick the correct polish for your stone. Finer gradations and “super polishing” are usually done with diamond paste.
Quality Control
Quality control is a major issue when it comes to polishes. Cheap polish is great for the wallet, but you can end up with deviations in the final grit of the polish.
You can avoid this problem by just making sure you’re using a reputable brand. All of the listed compounds above are used by professionals, so you won’t run into any problems.
The problems are usually just in grit, but they can be pretty bad. I’ve seen polishes test out at 200 grit… which is a great way to absolutely destroy the careful sanding and grinding you’ve done before you get to that point.
The majority of budget polishes will be fine, but it is an issue that should be acknowledged.
Health Considerations
The majority of polishes will release particles you really don’t want in your body. You should be wearing at least an N95 anytime you’re polishing, but a respirator is preferable.
The majority of polishes are pretty much inert, so acute toxic reactions are rare. That said if you’ve been advised to avoid a certain metal then you should stick with diamond paste for final polishing.
Form
I prefer hard polishes for the most part. Powders and pastes tend to be a little bit more difficult to use.
You may not have much choice in this area. Most solid polishes hide their ingredients to some degree and you may need to look them up.
This is mostly a convenience issue, we’ll discuss how to use each with different tools in just a moment.
Situational Use
I’ve often kept Linde A around just for stones that undercut. Undercutting, orange peeling, or whatever you’d like to call it is a gigantic pain to handle. It’s prevalent in stones with mixed compositions.
I’ve found Linde A works best for getting this final polish done without tearing apart any of the softer inclusions. If a stone heavily undercuts and won’t even out with my usual methods… I switch it up.
It’s never a bad plan to switch polishes if you’re having problems. You just need to know which options are available to you to help and keep some things on hand to help with common problems in the material you cut.
Likewise, my workshop puts out a lot of silver pieces so
How to Use Your Polish
Buying the polish is one thing, but what are you going to do with a plastic tub full of orange-ish powder or a big green stick of wax?
Well, you’re going to use it to polish your stones!
Each type of polish is a little bit different when it comes to final use. It also depends on the tools you’re using to accomplish the task.
By Hand
Polishing by hand is a pain, but it can be done. You’ll want to use a piece of leather or cloth to spread the polish around.
To get a bit of a hard polish on the cloth you’ll just need to rub it around on the stick or block until you get some polish on it. Then just get to rubbing.
Mix powders in a small container with just a touch of (preferably distilled) water. You can apply the paste directly to the stone with a finger and use that to polish, it’s usually easier than trying to apply it to the rag.
Pastes are very rarely used by hand, but you can just put a bit on a cloth and it’ll work.
With a Rotary Tool
Whether it’s a cheap Dremel knock-off or an expensive, professional-grade flex shaft, rotary tools are a great way to polish. I use a felt wheel for all kinds of polish, but you need to be wary of the amount of heat produced if you’re working with soft stones.
To get hard polish on your felt wheel, just fire up the tool at a low RPM and touch it to the top. You don’t need much, you can let off when you have a full ring of color around the outside. It doesn’t need to work to the edges of the wheel, you’ll do that while polishing.
For cerium oxide powder I often make the paste directly on the stone. I apply a sprinkle of cerium oxide, rub some water into it to make a thin paste, and just get at it with the flex shaft. It can be a bit messy but it works well.
You can do the same with diamond paste, you just don’t need to add water.
On a Wheel
You can charge your wheels with any polish, but it depends a lot on the wheel you’re using.
Leather is preferred by some, and cloth or felt by others. Leather wheels have a harder time picking up hard polishes, in my experience, but they’re great for diamond paste and fine polish on hard stones. They also work well for softer stones, since you don’t have to mind the heat as much.
It’s always been my stance that leather falls short on agate, jasper, and most other common silica-based minerals. Since those are my primary cutting materials and I work silver in the shop, I stick with felt or cloth wheels.
Charging these wheels is about the same as using a rotary tool, just scaled up.
These are usually the best option if you have access, but be careful when modifying tools not meant for lapidary use. In particular, you may find that cheap bench grinders will get dangerously unbalanced with a polishing wheel on one side and a grinding wheel on the other if the tool isn’t mounted.
- Online rock and mineral club for collectors of all levels!
- Find community with like-minded rock and mineral enthusiasts.
- Monthly Giveaways!
- Free Access to Entire Digital Library of Products (current and future products)*

