The Hauser Geode Beds in Southern California are on the bucket list for many rockhounds. On the other hand, they’re also in a remote location and many people don’t know where to start.
Good news! We’re going to teach you about the area, what you can find, and what you need to make sure that you have a successful rockhounding expedition!
First, Let’s Talk About Desert Safety
The Hauser Geode Beds are located in a remote part of the Mojave. Those who’ve never spent time working in a desert often underestimate just how bad conditions can affect them.
That may not be a problem as long as everything else works. But cars break down, things happen, and you should know the basics before you head out. You don’t need to know where to dig rough “wells” or trap jackrabbits, but you should take some serious precautions.
You should have all of the following in your vehicle and kit:
- At least 1 gallon of water per person per day plus an extra two days worth
- Food for at least one more day than you’re planning on staying
- A first aid kit to be carried by someone at all times
You should also be aware of the signs of heatstroke and heat exhaustion. A quick refresher never hurts.
The most important part of your trip is staying hydrated. Otherwise, you run the risk of serious complications.
You should dress appropriately and use a hat as well. A simple Boonie hat can be a lifesaver when you’re working in an exposed area. Make sure your clothing is protective, chances are you’ll be breaking some stones.
That said, a trip to the desert isn’t nearly as scary as you might think. Proper preparation will save you from the majority of problems that you might encounter.
Gearing Up
In addition to the food and water, you’ll also want to bring some basic mining equipment.
But first, you’re going to need a pair of safety glasses. ANSI-rated glasses can easily be found, I prefer DeWalt’s mid-grade safety glasses but you can find a suitable pair at Harbor Freight for a couple of dollars.
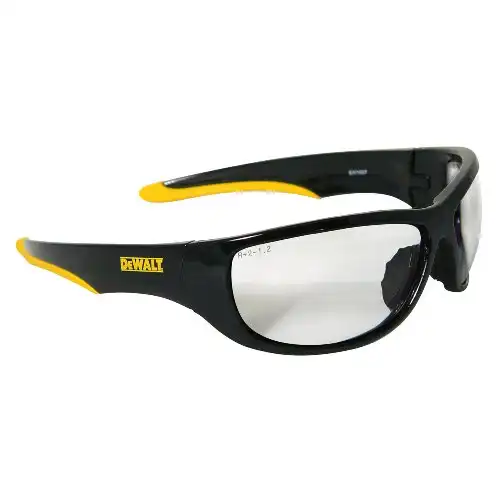
Don’t skip your goggles. Removing rock shards from your eyeball isn’t an ideal way to spend an afternoon. I speak from experience.
If you’re swinging a tool, then your eyes should be covered.
You may want a tough pair of gloves as well.
You’ll want the following:
- Rock Pick– For prospecting and smaller strikes, a rock pick is invaluable. The linked model is a 13oz model, ideal when you have heavier tools in your bag. A larger rock pick is better if it’s your only tool.
- Mallet or Sledge Hammer- Something in the three-pound range is my go-to. Remember that you’ll be carrying quite a few tools so there’s no need to overdo it on weight.
- Masonry Chisel- While cold chisels can work, a masonry chisel with a carbide tip is better. Learn the difference before you invest in a set.
- Folding Shovel– Military surplus is my standard, but any good one will do. Look for a wooden handle if you’re ordering online, it’s usually a sign of higher quality. This isn’t the place to go cheap, a bad one is worse than useless.
- Pick- A full-size pick is a good idea, and I’d make it the only full-sized tool to carry in most cases.
- Fixed Blade Knife- Any cheap knife will do, but they often prove invaluable. The Morakniv Companion is dirt cheap and tougher than most. Pretty much ideal for a knife that may end up being used to pry and poke.
These should let you get into the majority of areas in the Wiley Well’s Mining District without too many problems.
In some places, you can bring heavier hammers or full-sized shovels easily. Just make sure you’re not carrying more than you can handle.
The desert isn’t the place to prove how much weight you can carry in a ruck, err on the side of caution.
Field guides can be useful as well, especially when time is short. Rockhounding the Wiley Wells is an ideal guide, and it includes GPS directions. That last bit alone puts it ahead of the competition since most older field guides provide less precise directions.
Getting to the Hauser Geode Beds
The geode beds are a bit out of the way, but you can access some of them even with a passenger vehicle. This is a remote area, however, and if there have recently been rains you may have difficulty without higher ground clearance.
To reach all of the beds you’ll need a 4WD vehicle with high clearance, and a bit of experience driving it.
These days, you can usually just punch the location into your smartphone, but you should have a general idea of where you’re headed.
To get to the main staging area, you’ll want to take off from Blythe. You’ll head West out of town on the 10. Keep your eyes out for Wiley Well’s Road, you’ll be heading south on it. The length of the highway between Blythe and Wiley Well’s Road is a bit shy of 20 miles.
Wiley Well’s Campground is about 8 miles south along the road and serves many rockhounds as a place to set up for trips that last more than a day. You can head further south to Coon Hollow Campground as well, it’s a bit closer to some of the locations.
Main Hunting Grounds in the Hauser Geode Beds Area
From either of the campsites in the area, you can access a few different geode beds in addition to the main Hauser Geode Bed.
Each location has slightly different stones in the ground, and some are harder to reach than others.
The following are the four “main” areas, but there are countless places in the Wiley’s Well District to find stones other than geodes.
Hauser Geode Beds
From the campsite, you can head south. Very soon you’ll see a turn-off to the right, which leads to Hauser Geode Bed Road. This is a dirt road, and conditions vary depending on weather and recent use. A passenger vehicle will usually make it but may encounter some difficulty. A truck is a better idea.
You’ll encounter a fork in the road, take the right-hand path. The left leads to the Potato Patch, which we’ll cover next.
These are the main beds and the place you’re most likely to run into other people.
Quartz geodes can be found here. Check washes in the creek bed, the hillside, and the other usual suspects. The geodes here are usually lighter in color than the matrix.
The vast majority of geodes collected here will be quartz of some variety. Amethyst is very rare but present. Smoky quartz can also be found here.
For some digging tips see below, but this is a straightforward affair if you’ve ever hunted for geodes before.
Potato Patch
The Potato Patch is very close to the Hauser Geode Beds. Just go south from the Wiley Wells campground, follow Hause Geode Bed Road and take a left on the fork.
There’s a catch: you’ll need a 4WD vehicle to make it up the road in most cases. The road here is a lot rougher than the road leading to it.
The Potato Patch has been a hit with rockhounds for almost a century. It’s been said that no one even bothered to dig for the first couple of years after its discovery.
There are still a few surface finds available for the lucky. The rest of us can dig into the dense collection of them which lies underneath the volcanic ash making up the area’s soil.
Cinnamon Geode Beds
The Cinnamon Geode Beds are similar to the Potato Patch and Hauser Geode Bed when it comes to finds. That said, it’s a very difficult-to-reach location and you’ll need a 4WD to get there. Directions are scant, you’ll be on roads and trails with no name to get out there.
A GPS is a must. People have lost their entire day just trying to find the place and descriptions of how to get there using things like old refrigerators as landmarks. It’s down Bradshaw Trail, which can be found directly south of the Wiley Well’s campground.
The geodes here tend to be larger than those found in the other beds, with very large cavities. This can be a problem for some geodes, they tend to break very easily after a certain point in size.
Black calcite also occurs in this part of the desert. It’s mostly found as small crystals inside quartz geodes.
It’s an adventure, but if you choose to venture out here you’ll be well-rewarded. The remote location and difficulty getting there will just mean fewer rockhounds have been picking the spot over!
Northern Black Hill Geode Bed
Another of the locations is on Bradshaw Trail, the North Black Hill site is found about 11 miles down the road but the turn-off you’ll want is closer at around 3.5 miles from the turn-off. This rough road leads to a fork, where you’ll want to take a left. It ends at the Black Hills site.
This is another remote location, but it also has its own interesting stones in addition to the geodes. You’ll be doing a lot of hard digging in this area, so make sure to bring appropriate tools.
This location has a lot of jasper in addition to geodes. More interesting is the black seam agate that’s found in the same area as the geodes, often within jasper.
This is another adventurous dig, and not everyone will be up for it. If you are just be aware that it may be weeks before another person happens along. This area is not well-known and is remote even for a remote area.
Other Locations for Rockhounding in the Area
This entire region of California has a lot of stones. If you know the basic spots to look for, you’ll be in good hands here. Just make sure to be safe.
Other locations of interest include:
- Opal Hill Mine
- Black Agate Thunderegg Mine
- Every wash in the area
A good field guide is invaluable for this area. I’ve seen GPS coordinates listed for all sorts of things in the backwoods here, but a lot of them are very hard to access for the average person. 4WD, supplies, and an adventurous spirit are a must but there’s an incredible variety of minerals in the region.
Identifying Geodes in the Beds
If you’re not familiar with geodes, you may have some issues. There’s nothing more disappointing than cutting into a “geode” to find out that it’s just a bit of mud.
For the most part, the stones here will be lighter than the solidified mud and stones around them. They’re usually round-ish in shape, ranging from nearly spherical to elongated ovoids.
Normally, the weight is a dead giveaway. Here, however, there are also large amounts of gorgeous thundereggs, which will feel quite heavy.
You’ve got three main spots to find geodes in the Hauser Geode Bed proper.
- Volcanic ash beds
- The hillside
- Washes
Sifting the ash can be disappointing, especially if you don’t dig down first. In the less worked over beds, like the Potato Patch, it’s still a promising way to find geodes.
Washes are always promising for finding stones. It’s just the way of things, as any rockhound will tell you. Dig down into the larger stones, smaller geodes and broken bits of nodules may be hidden underneath.
The hillside is mostly just mining.
Give it a bit of a dig and you’ll start finding nodules locked into the matrix. Use your chisel and rock pick to pry them out. Not every “geode” will have anything good inside, some will even be empty.
That said, the Hauser Geode Beds are the opportunity of a lifetime for most rockhounds. This is bucket list stuff.
Speaking of which, make sure to bring a bucket for your finds. This is one of the richest geode-bearing sites in the United States!
- Online rock and mineral club for collectors of all levels!
- Find community with like-minded rock and mineral enthusiasts.
- Monthly Giveaways!
- Free Access to Entire Digital Library of Products (annual memberships)
