How To Drill Holes In Rocks
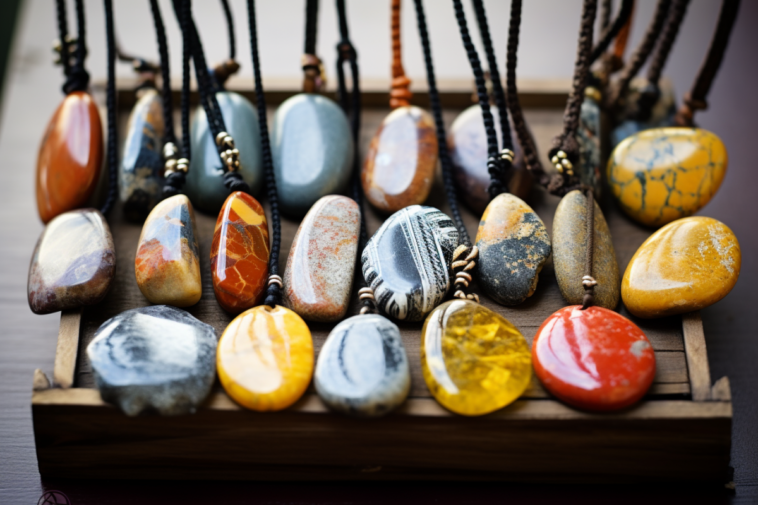
Years ago I was captivated by an artisan working on jewelry at a Renaissance festival. She was creating a necklace using Tiger’s Eye and drilling out a hole with a hand-powered drill. I was just as impressed with the skill needed to work the tool as much as I was with the necklace being made.
Many of today’s jewelers work with small rocks, creating beautiful and intricate pieces. A lot of items need holes drilled into them, and artists have a wide selection of tools to choose from. What follows is an overview of some of the more popular tools and how to drill holes in rocks for jewelry with them.
Things To Keep In Mind No Matter How The Hole Is Drilled
There are some steps that will be the same no matter what tool is used when drilling holes in rock. I want to list them here so that they will not be repeated. Your eyes will thank me later.
Working with water
In the steps listed below, you will note that I mention shallow containers that will be used to hold water. I use these containers to help keep the rock submerged as it is drilled, and the shallow sides allow access for my hands without awkward angles.
Using water keeps both the drill bits and the rock cool while drilling. This will help to extend the life of diamond-tipped bits. It will also prevent the rock that you’re drilling holes in from cracking due to heat expansion.
I try to keep materials that I am working on about one centimeter below the water surface. That keeps water flowing into the hole as I drill while preventing the chuck or tip of the drill from making contact with the water.
This is important, especially if you are using an electric rotary tool. It is worth stating the obvious here; water and electricity do not mix well together. Exercise caution when using water near your electric-powered tools.
Use Proper Drill Bits When Drilling Holes in Rock
Diamond-tipped drill bits are what is used to make holes in rocks. The diamond material provides a hardness that metal alone cannot provide. Smaller bits will encounter less resistance during drilling but they are also more prone to breaking than bits with larger diameters.
There are two choices when it comes to diamond-tipped bits. There are diamond-coated twist bits as well as diamond-coated core bits. Twist bits have a solid shaft with a traditional corkscrew-shaped edge that helps to bore out a hole, while the core bits have a hollow shaft with a straight edge that cuts a plug out of the rock.
I would suggest trying out both types to discover which one that you prefer. These bits come in a variety of sizes, so my suggestion would be to grab a few different ones for particular jobs or rock sizes.
Drilling From One or Both Sides of the Rock
Deciding to drill from one or both sides of the rock for jewelry should be decided before work begins. If the jewelry piece will only display from one side, you may want to consider drilling from the outer side completely through. The backside will likely blow out but it will not matter as that side will not be seen.
If both sides will be visible on the piece you will need to drill from both sides in order to prevent blow out damage on the faces. I use two pieces of string, one crossing horizontally and one vertically, in order to mark both sides for drilling. By lining the string up so that they cross at the same location on both faces I can mark points that will meet up when I drill.
Be Safe as You Work
Nothing will end your work session of drilling holes in rock faster than an injury caused by your tools. I always recommend using proper safety gear and procedures when making jewelry, especially with tasks like drilling into small rocks.
If you are going to use an electric rotary tool, make sure that you follow all operating and safety instructions that the manufacturer offers. These instructions will keep you safe and prevent possible damage to your power tools.
You will want to wear safety glasses when drilling with electric or hand-powered drills. Even small fragments that break away during drilling can cause eye damage. I also suggest using a mask to prevent dust particles from entering your lungs as you breathe.
Keep your work area clear from clutter, and make sure to wipe up any water between drilling sessions. I also recommend that you use a drill press vice or similar fixture to hold the rock during drilling. This keeps your hands clear of a drill bit that may slip as well as keeping both hands free (which is mandatory with hand-powered tools).
Drilling Holes In Small Rocks With A Rotary Tool
Drilling holes with a Dremel tool
Dremel is a popular brand of hand-held power tools. The company has a rotary tool product line that includes single speed, two speed, and variable speed models. You should be able to use the following information for drilling into small rocks, no matter which Dremel rotary tool you use.
What you will need:
- The rock that you are going to be working on.
- Basic pen or pencil to mark the point where the drill bit will cut.
- A base to hold and support the rock as it is being drilled.
- The Dremel rotary tool.
- An adjustable chuck, like the Dremel multi-chuck, that can securely hold smaller drill bits.
- The drill bits that will be used to make the hole into the rock.
- A shallow container or dish that can hold water.
- A towel for cleaning up water and debris.
- Safety glasses and a mask for blocking dust.
How to drill into small rocks
- Begin by setting up your work area. This should include clearing away any clutter and making sure that you have enough light to work by.
- Next, set up your container by placing it on your work surface. Make sure that you can reach into the tray comfortably. Fill the container with water, with the level reaching to about one centimeter above the top of the rock being worked on.
- Place the rock, along with the vice or other device you plan to use for securing it, into the dish.
- Put on any safety gear that you are going to use. I also like to take the time to roll up long sleeves if I am wearing them as well as put on an apron to protect my clothing.
- Select the drill bit that will be used and insert it into the chuck. Make sure that it is secure before turning on the Dremel.
- Adjust the speed setting, making sure that the rotary motor is running on the lowest setting. This will be about 5,000 RPMs for most Dremel models.
- Use a pen or pencil to mark the spot you wish to drill. Mark both sides of the rock if it will be drilled from both sides.
- Turn the Dremel on and begin drilling by placing the bit at a 45-degree angle from the surface. This angle will begin to dig into the rock while limiting the possibility of slipping during use.
- Once the hole has begun, adjust the angle of the bit by slowly bringing it to a 90-degree angle from the surface of the rock. Allow the bit to do the work; only apply minimal pressure to keep the bit in place. Move the bit up and down as you drill in order to allow water to flow into the hole at the point of contact.
- Allow the bit to work through the rock and out the other side if you are not worried about the condition of the opposite face. If the rock is to be drilled from both sides, drill to the desired depth before flipping the rock over. Secure it in place and begin the drilling process described above again, drilling until the bit meets up with the hole from the other side.
Using other brands of rotary tools
Other types of rotary tools, such as the Foredom models, use a flex shaft attachment connected to a motor for drilling on rocks. The materials needed are the same as for Dremel type tools and the procedures for the operation will remain nearly the same as those listed above. Any small differences will be addressed in the operating manual of the product that is used.
Drilling Holes In Small Rocks Without A Rotary Tool
Rotary tools, like the Dremel, are not the only types of tools that can be used to make holes in small rocks. From ancient hand-powered technologies to modern electrical press designs, jewelers have a variety of tools to choose from.
Drill presses
These devices can be easier to work with than hand-held rotary tools. The only difficulty here will be lining up the bit with the mark you make on your rocks.
What you will need:
You will need the same components that are required for rotary tools. The only exception here would be the chuck. A smaller chuck will be needed for a full-sized drill press while tabletop versions should be able to use smaller bits automatically.
How to drill into small rocks
I follow the same steps here as I would with a Dremel. Note that vice or another device to hold the rock is critical here. You don’t want to be holding the rock with your fingers as you try to operate the press. You won’t be able to angle the bit when you start the hole like you could with a hand-held tool, so that makes a holding device important as well.
The only additional step here is that you must align the drill tip with your mark on the rock before you start the drilling.
Hand-powered tools
For many jewelers, working with traditional hand tools is as enjoyable as making the jewelry. These tools can include bow drills, hand drills that resemble screwdrivers, as well as “egg-beater” drills. The setup and operations are nearly the same for all so I am grouping them together here.
What you will need:
- The rock that you are going to be working on.
- A pen or pencil to mark where the drill bit will cut.
- A base to hold and support the rock as it is being drilled.
- The hand tool.
- The drill bits that will be used to make the hole.
- A shallow container or dish that can hold water.
- A towel for cleaning up water and debris.
How to drill into small rocks:
The procedure for setup will be the same as it is for electric-powered tools. As these tools are powered by hand, you will need a clamp or other device to hold the rock as both hands need to be free.
While some jewelers are able to drill from only one side with hand-powered tools without blow out, I still drill from both faces to be safe. Start the bit at an angle, just like when using a rotary tool for drilling. You will not generate as much drill bit rotation but it is still important to use water as you work.
One thing that you need to keep in mind is pressure. I found that I pushed down on the hand drill when I first started using them. Let the bit do the work for you. Use enough pressure to keep the bit in place, that will help prevent smaller bits from snapping as you drill.
These types of tools will take longer to drill through rocks, but you are less likely to damage the material you are working with or the bits that you use.
- 7 Of The Largest Gold Nuggets Ever Found…Ever! - December 21, 2023
- Find Gold On Your Property? Here’s Why You Should Think Twice Before Spreading the News - December 21, 2023
- The Opalized Crab Claw (And How It Formed) - September 14, 2023
- Online rock and mineral club for collectors of all levels!
- Find community with like-minded rock and mineral enthusiasts.
- Monthly Giveaways!
- Free Access to Entire Digital Library of Products (current and future products)*
