How to Hammer a Silver Ring from Scrap Metal
Learning how to silversmith can be daunting, especially considering how many skills you need to develop and tools to buy. Fortunately, you can do a lot without requiring a ton of specialized tooling and materials.
Let’s get to it: I’m going to teach you how to hammer a silver ring from scrap material, using just a few tools!
What You Need
You’re going to need a few things, but I’ve done my best to make sure that we’re mostly working with tools that you can purchase anywhere.
You’ll also need some silver scrap for a starting point, preferably with a bit of fine silver to mix in. The ring I’ll be showing you is created from 12 grams of silver, 1.2 grams of fine silver casting grain and 10.8 grams of dirty scrap from my box.
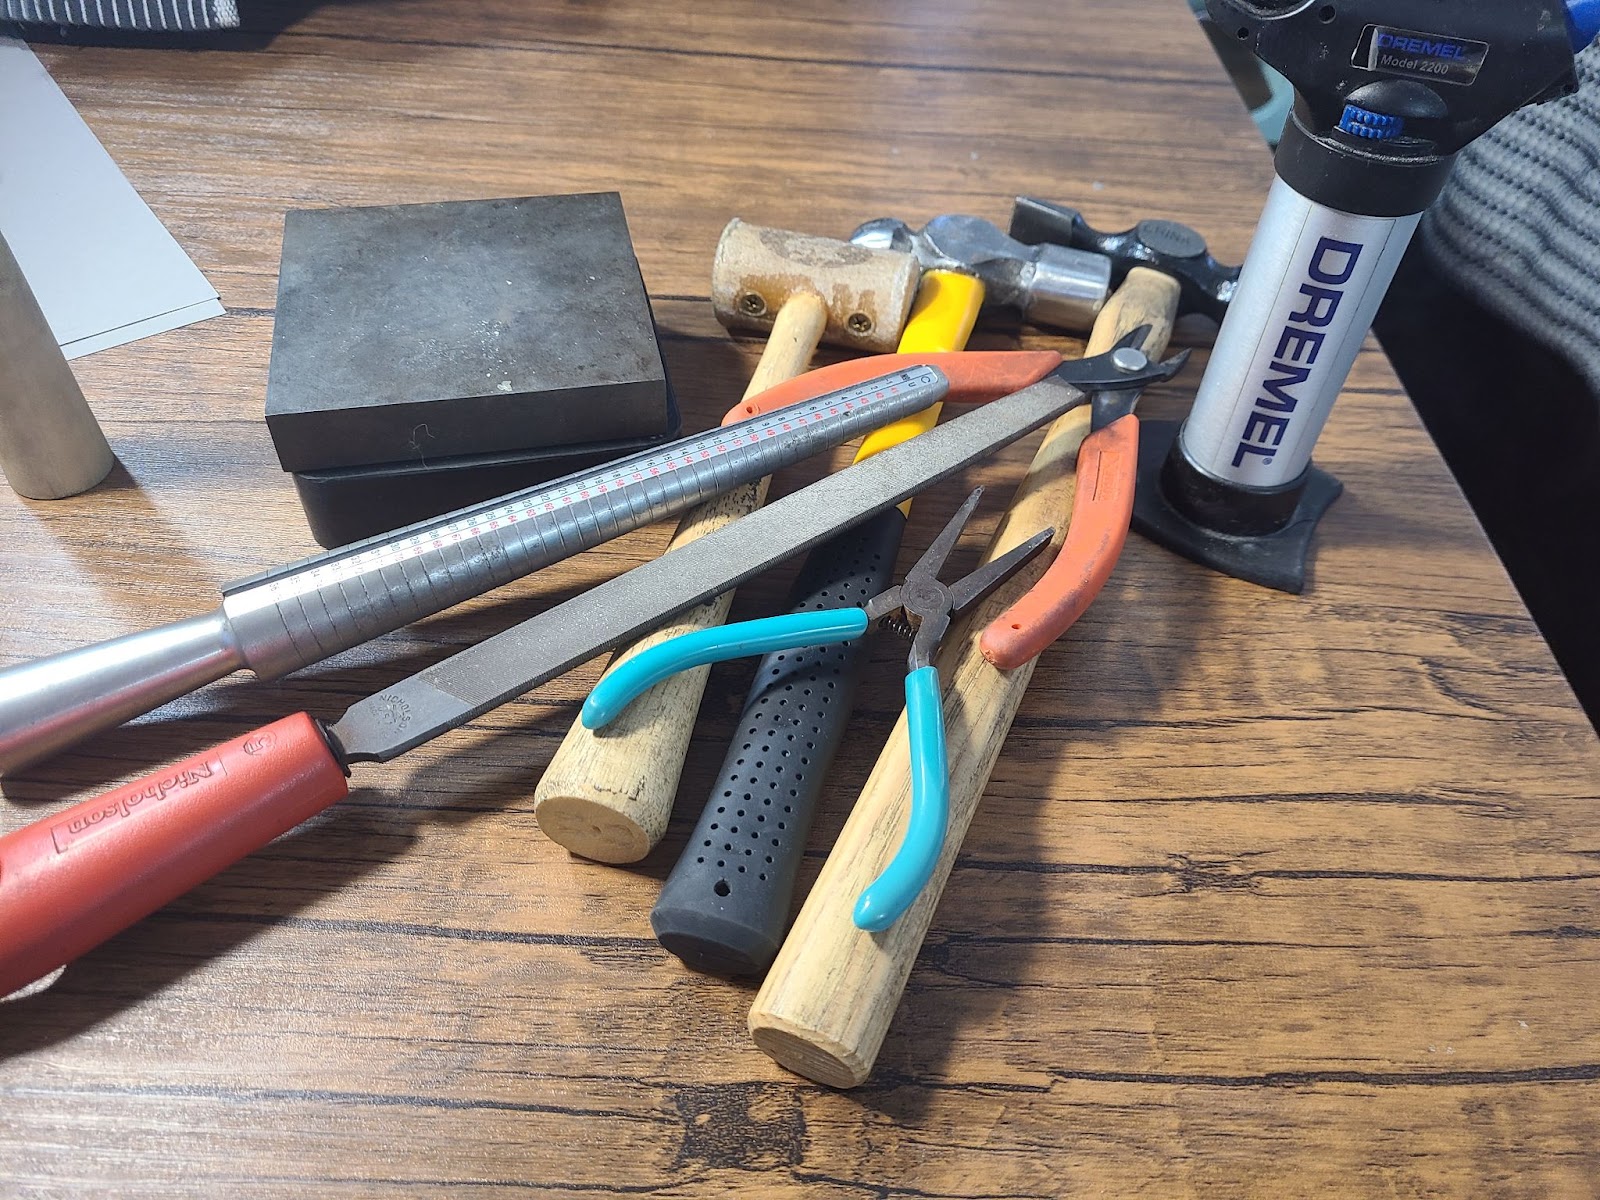
So, you’ll need:
- A Torch- A big butane torch will do it in most cases. I’ve been able to melt up to 14 grams with one and a carved firebrick. Check out our torches guide for a good starting point!
- A Ball-Peen Hammer- Any will do, but lighter is better. I’ll be using a 1lb ball peen hammer to texture the ring as we go into the tutorial. A little bit of prep may be necessary, which I’ll cover in Step 1.
- A Steel Stamping Block or Anvil- Preferably you’ll have at least 4” of space to hammer, 6” is better. A block is better if you need to purchase something to start with, just make sure to get a rubber block to put under it.
- Fire Brick or Charcoal Brick- Charcoal actually works better, but I prefer not to use one indoors and instead cut down a fire brick as you’ll see in Step 2. You’ll be digging into it a bit to create your ingot “mold.”
- Cross Lock Tweezers- The safest route to pick up small pieces of silver to quench them.
- A Quench Jar- Any jar full of water will do the trick.
- Long Chain Nose or Needle-Nose Pliers- A pair of long chain-nose pliers is preferable, but I’ll show you how to prep a pair of standard pliers to handle the task.
- Hand File- A 6” flat file is perfect for this. Smaller key and needle files can be used but they’ll make things harder on you.
- Sandpaper- 400 grit is fine for the whole process, but having multiple grits available will help a lot when finishing the ring to your desired polish.
- Silver Solder, Hard- Wire, sheet, paste, whatever floats your boat. The paste is easiest to use since you don’t need to flux, but it’s harder to make an invisible joint with. I’ll also describe a way to do this without soldering, but soldering is much preferred for both aesthetic and structural reasons.
- Ring Mandrel- Or at least something round, strong, and the right size for your ring.
- Flux- I use Stay-Silv, you can use whatever you think is best.
With all of those materials gathered together, you’ve got most of what you need.
You’ll also need some PPE:
- Glasses or Goggles- ANSI-rated. They should be on whenever you’re taking a tool to the metal. Goggles are better, but not 100% necessary.
- Mask- If you’re performing this operation indoors you should wear a mask during the melt of the silver and soldering. While both of these produce minimal fumes, the ones they produce are still quite noxious.
- Fireproof Apron-I prefer leather, but there are other options. This is just in case some silver gets loose on you while hot
You can also wear gloves if you feel it’s necessary. I don’t like any hindrance on my dexterity but have at it if it makes you feel more comfortable.
Step 1 – Prepare Your Tools

Your hammer needs to have no large markings on it. This ring will be a bit rough by design, but big gouges will transfer to your metal when you’re hitting it.
The hammer on the left is polished specifically for silver forging. The one on the right is just a general “smack stuff” hammer, but I’ve sanded out larger scratches on the ball on the rear end since we’ll be using it for this tutorial.
The sandpaper you purchased will do the trick. I’d start with 220 grit if you have multiple grades of paper, but 400 grit is a good finish for this project. For 100% clean forging in the future, you need a mirror polish.
If your stamping block or anvil is rough or rusted, you may want to sand it as well.
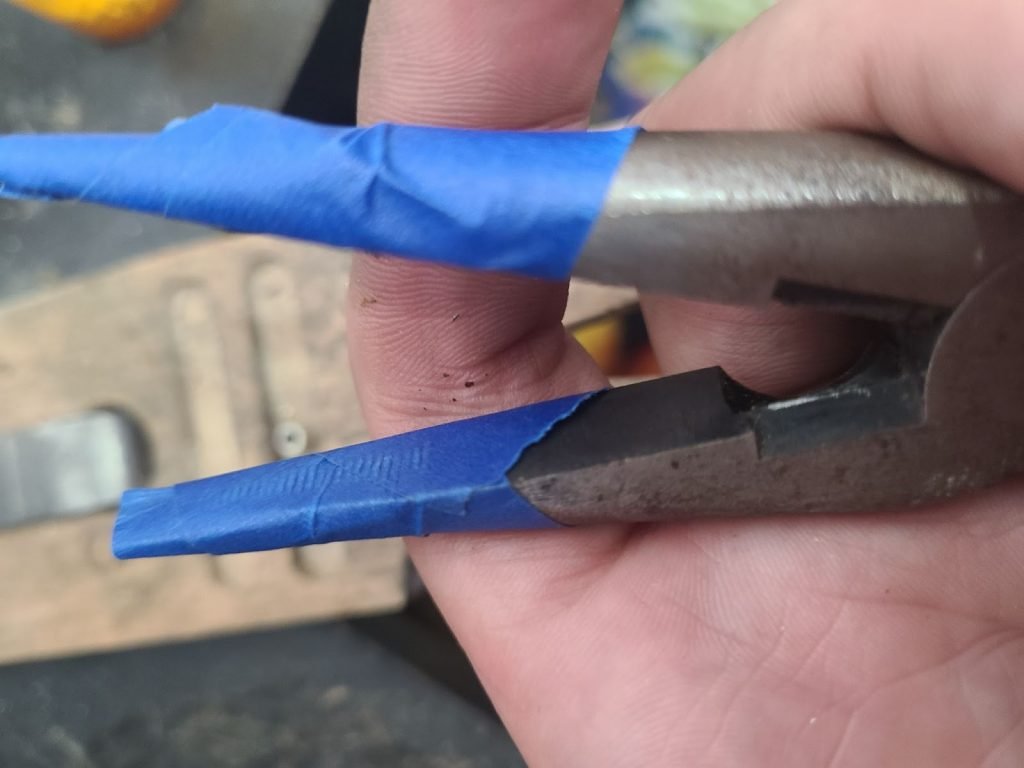
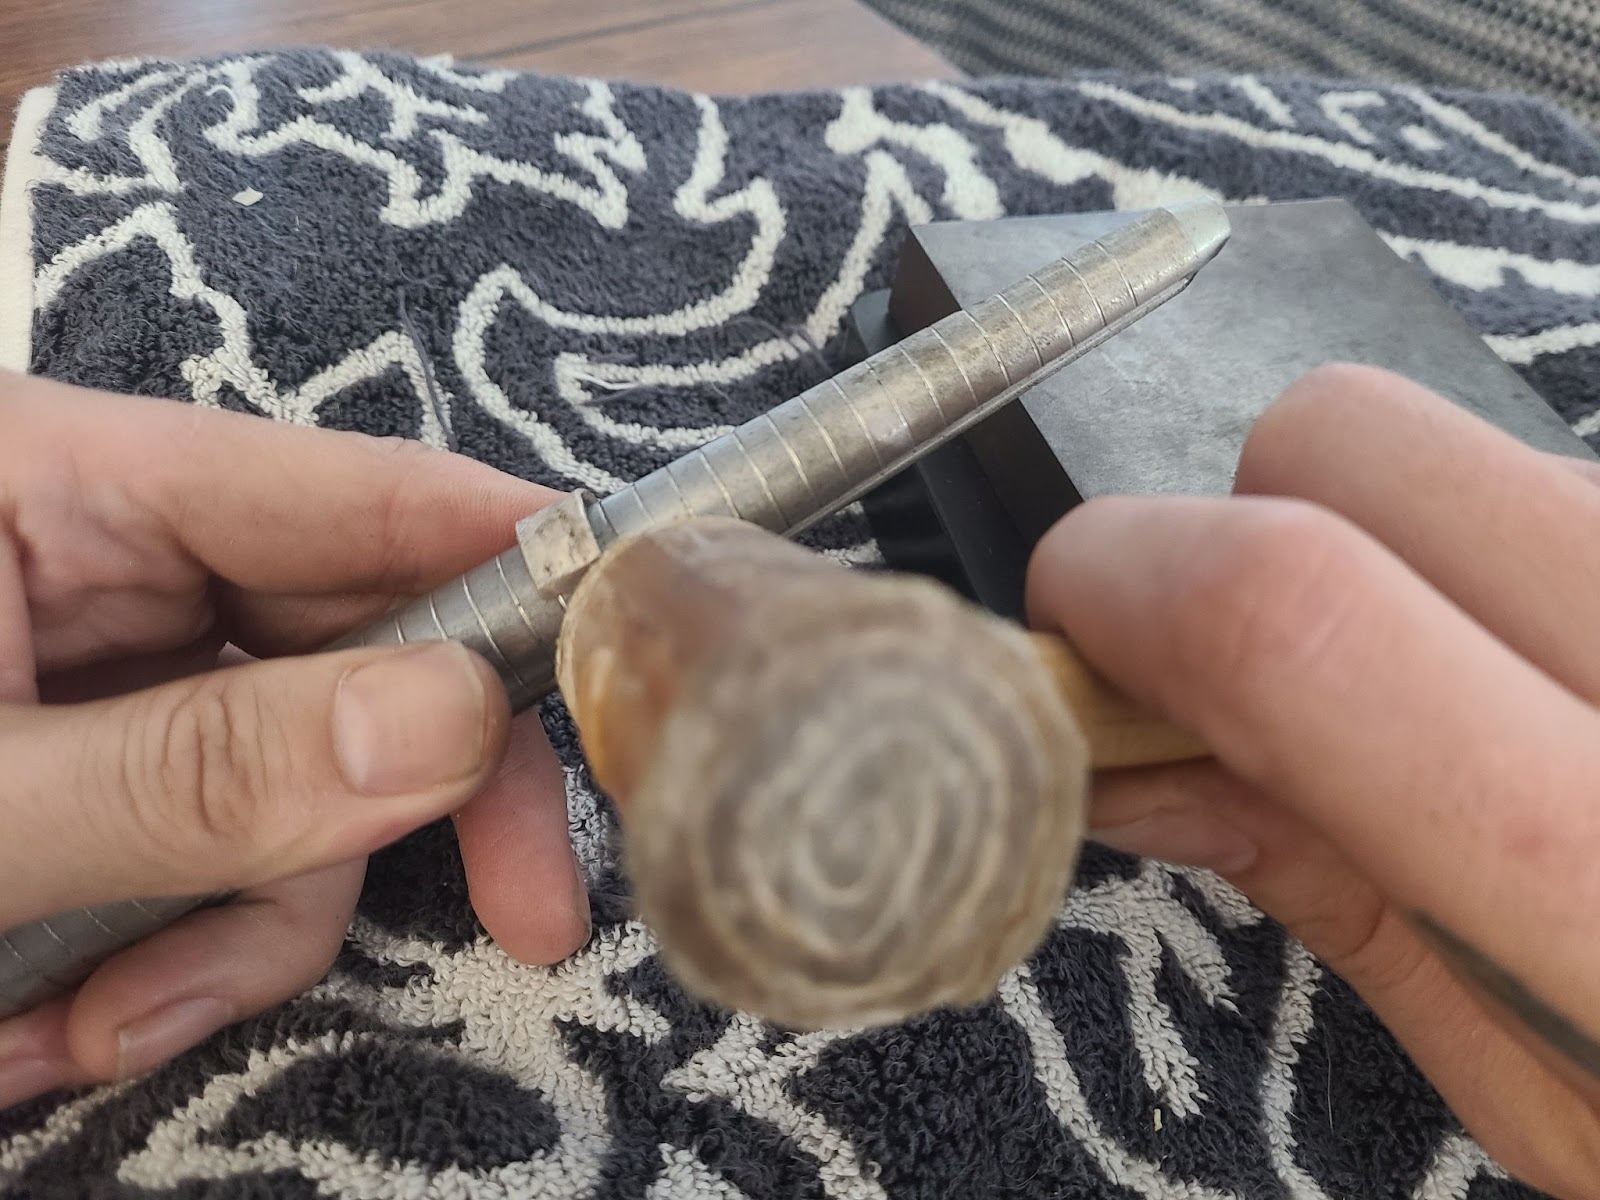
We’re going to be swaging this ring using a pair of pliers further on in the process. Long chain-nose pliers work best since they have an even edge and nothing to mark up the metal.
For our purposes, we’ll just cover them with painter’s tape. If you can get the chain nose pliers… do it. I picked up the pair I’m using from a low-cost kit from Michael’s but I’ve even seen them at some Walmart stores.
Wrap the flat portions a bit as well, trying to keep an even interior surface. You’ll have to be a bit more careful if you use needle-nose pliers as well but it’s doable on a first try.
Step 2 – Melt Your Scrap

I’ll be using 14 grams of silver total in this particular ring, adding 10% by weight fine silver casting grain to the mix.
If you’re using dirty silver, this is a must for a couple of reasons. The big one is purity testing if you sell the ring, but you also have to consider the metal’s overall quality. Metal with high zinc content (an additive in solder) is troublesome and you’ll lose more material having to file or cut away pieces.
You’ll have far more problems along the way if your silver is dirty.
If you don’t have fine silver on hand, then try to melt only pieces that are “clean.” That means no solder, and preferably a cleaned surface. All you need to do is rub off the tarnish with a bit of sandpaper and it’ll make for a cleaner melt.
If you don’t have a strong torch, try doing something like this:
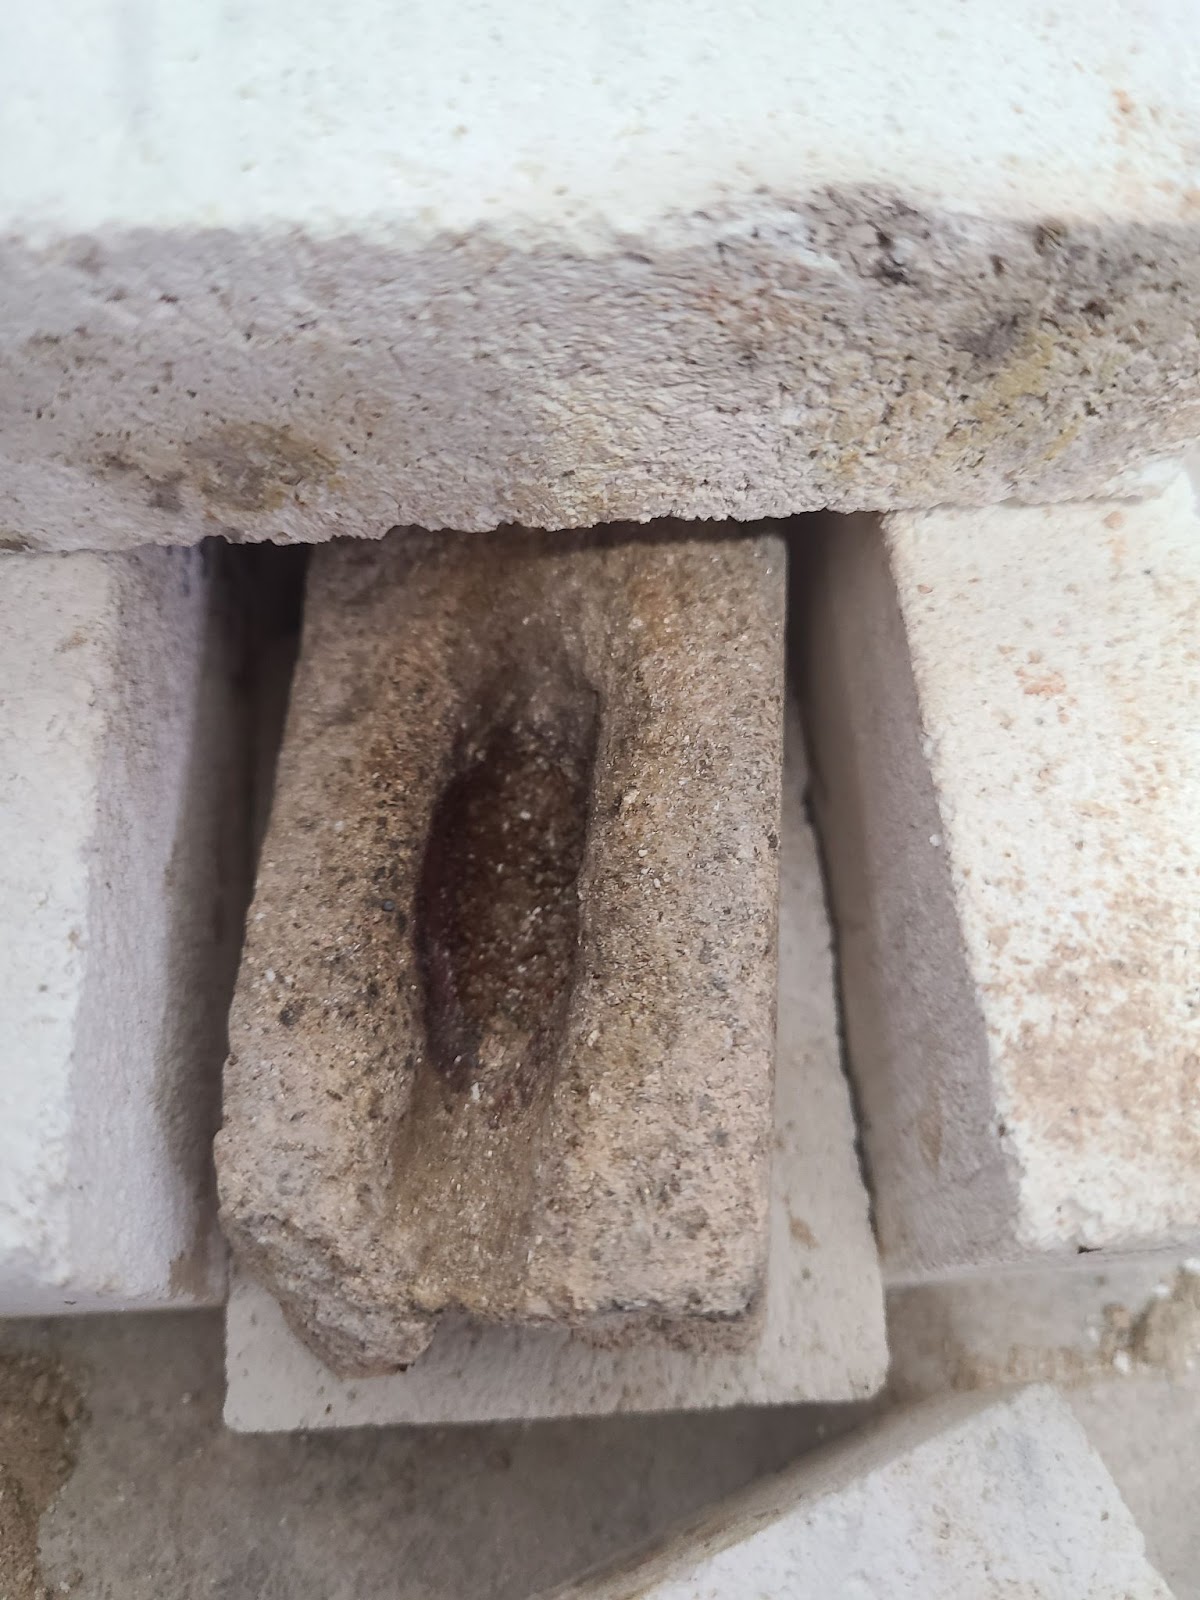
The canoed portion of the brick helps maintain heat. This one has been cut out of an older, soft fire brick that had already seen a couple of years of abuse. You’ll need a deeper canoe with fire brick than with charcoal, as charcoal tends to hold heat better.
Charcoal is preferred. The material will help prevent oxidation in and of itself, rather than forcing you to add flux to the mix.
Make sure the area is ventilated.
Load your silver up and get ready to fire. I recommend between 8-12 grams for this project, preferably on the high side of things.
This is going to take some time if you’re using a butane torch.
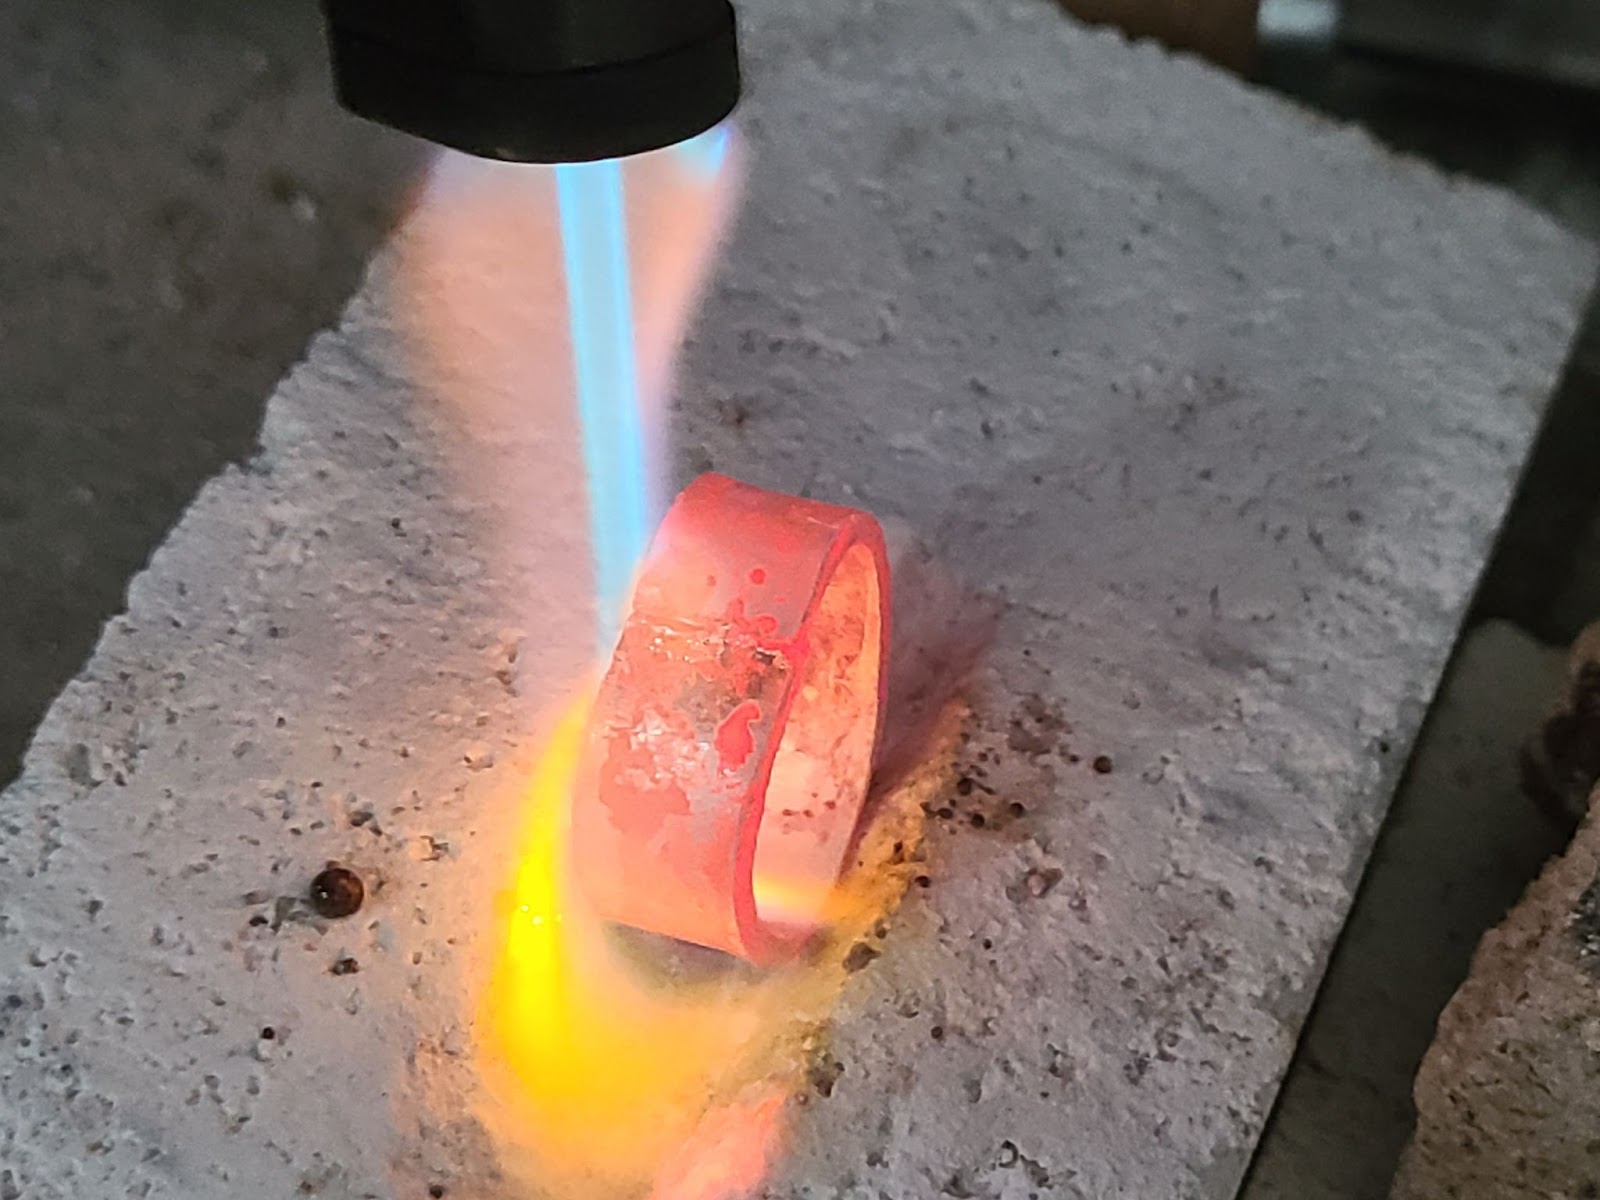
What you need to do is continually move the flame along the length of the “mold” in a circular pattern. Your goal isn’t just to heat the silver, but also to heat the surrounding material enough that the heat retention helps with getting the silver hot.
The silver will go red, orange, orange-yellow, then begin to look like just like liquid silver. Once it’s shimmering, that portion is ready to melt. You may need to use your tweezers to push the metal around and into one ball.
Once the silver is molten… you’re not done. Look for floating crud and scrape it off carefully with your tweezers or a small graphite rod. Bigger pieces will fold inwards easily once they’ve reached an orange heat, allowing you to push the silver closer together. This helps speed things up.
The whole ball needs to be very liquid, it should flow quickly if you tilt the brick. If you used flux, you’ll want to remove it at dull-red in color, otherwise, the flux may “grab it” as it reforms into a glass. If that occurs, reheat and carefully pry the silver up to remove it.
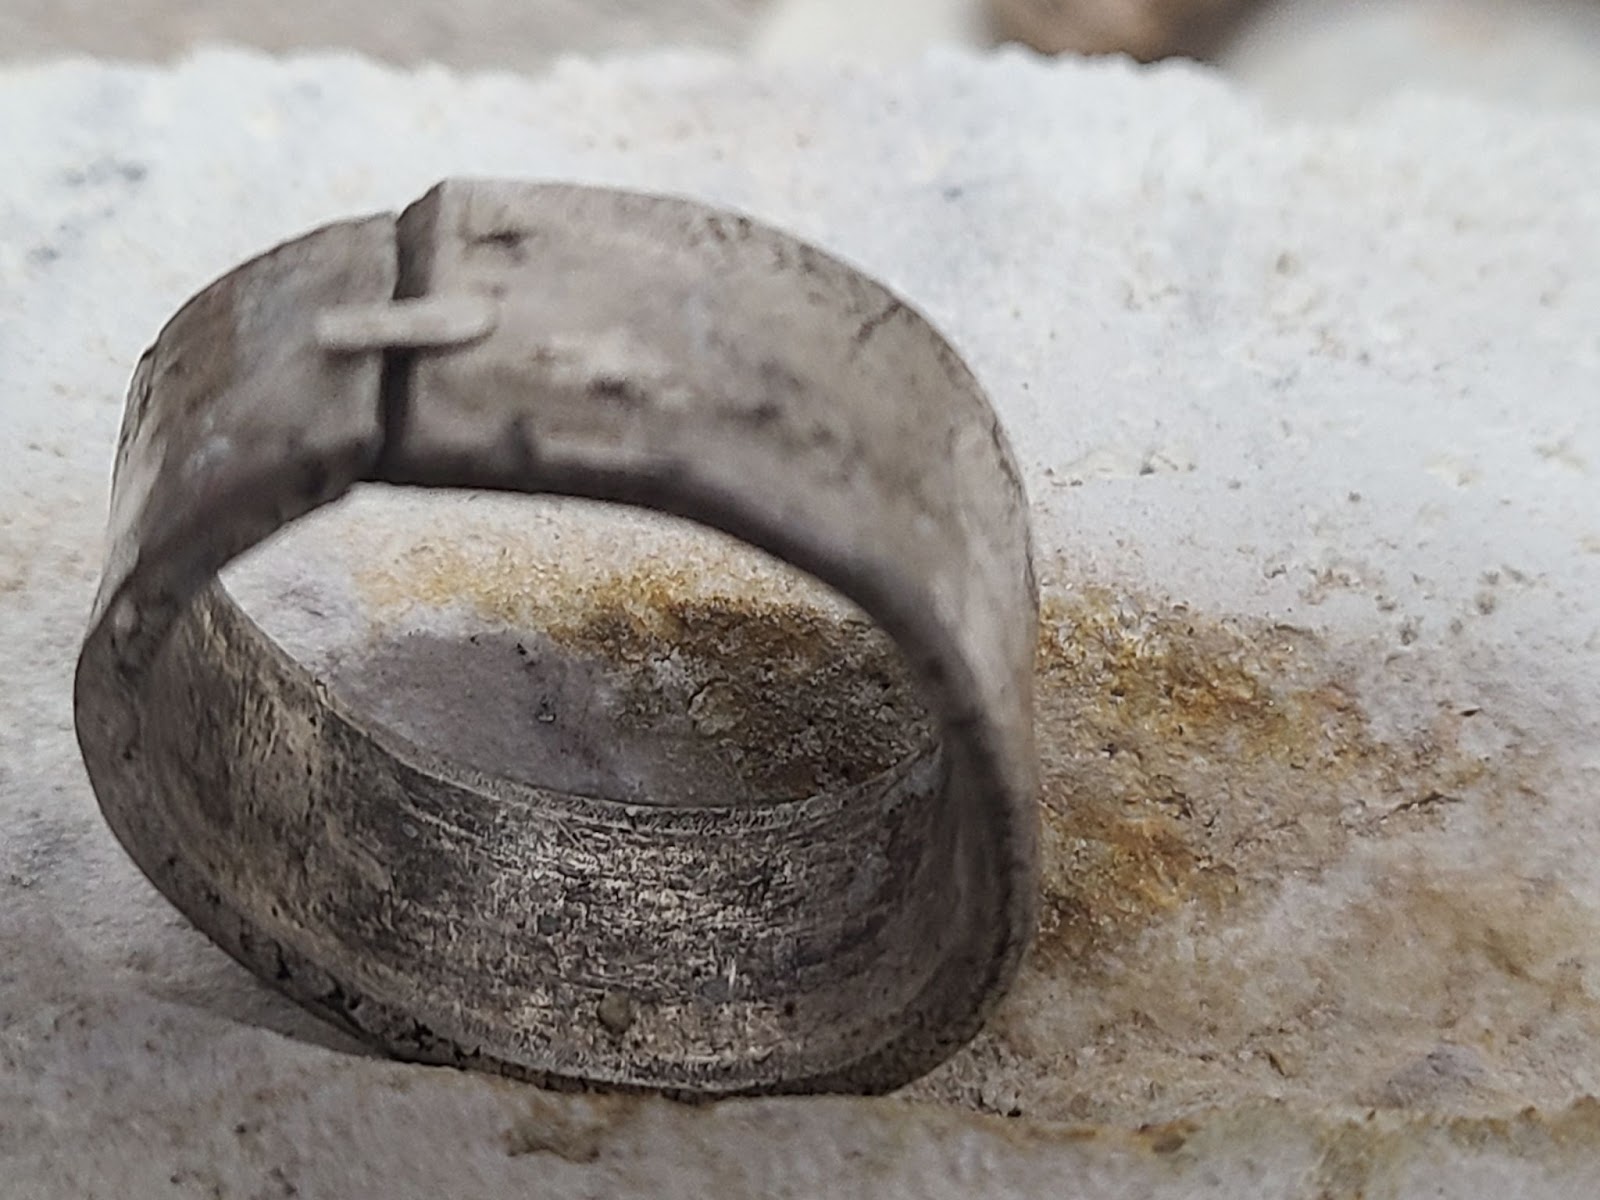
You’ll end up with something like this:
[pic of ingot]
She’s not pretty yet, but we’re making progress!
Let your ingot cool until it’s black temperature, dunk it in water, and pat yourself on the back. We’re ready to move on to the forging!
Step 3 – Forging the Ring

Take your quenched ingot and set it on the block or anvil. Hold it with a pair of pliers if necessary, but pound it on both sides with the hammer until you have two flat sides. Any internal voids need to be flattened before we go further.
Once you’ve flattened the ingot out, you’re going to need to anneal it.
Annealing is really its own subject but this is the gist of it:
- Place your silver on the brick.
- Heat until dull red or the flame turns orange.
- Allow the silver to cool to black temperature.
- Dunk in quench jar and wipe down.
You’re going to be doing this quite a few times as we forge it down.
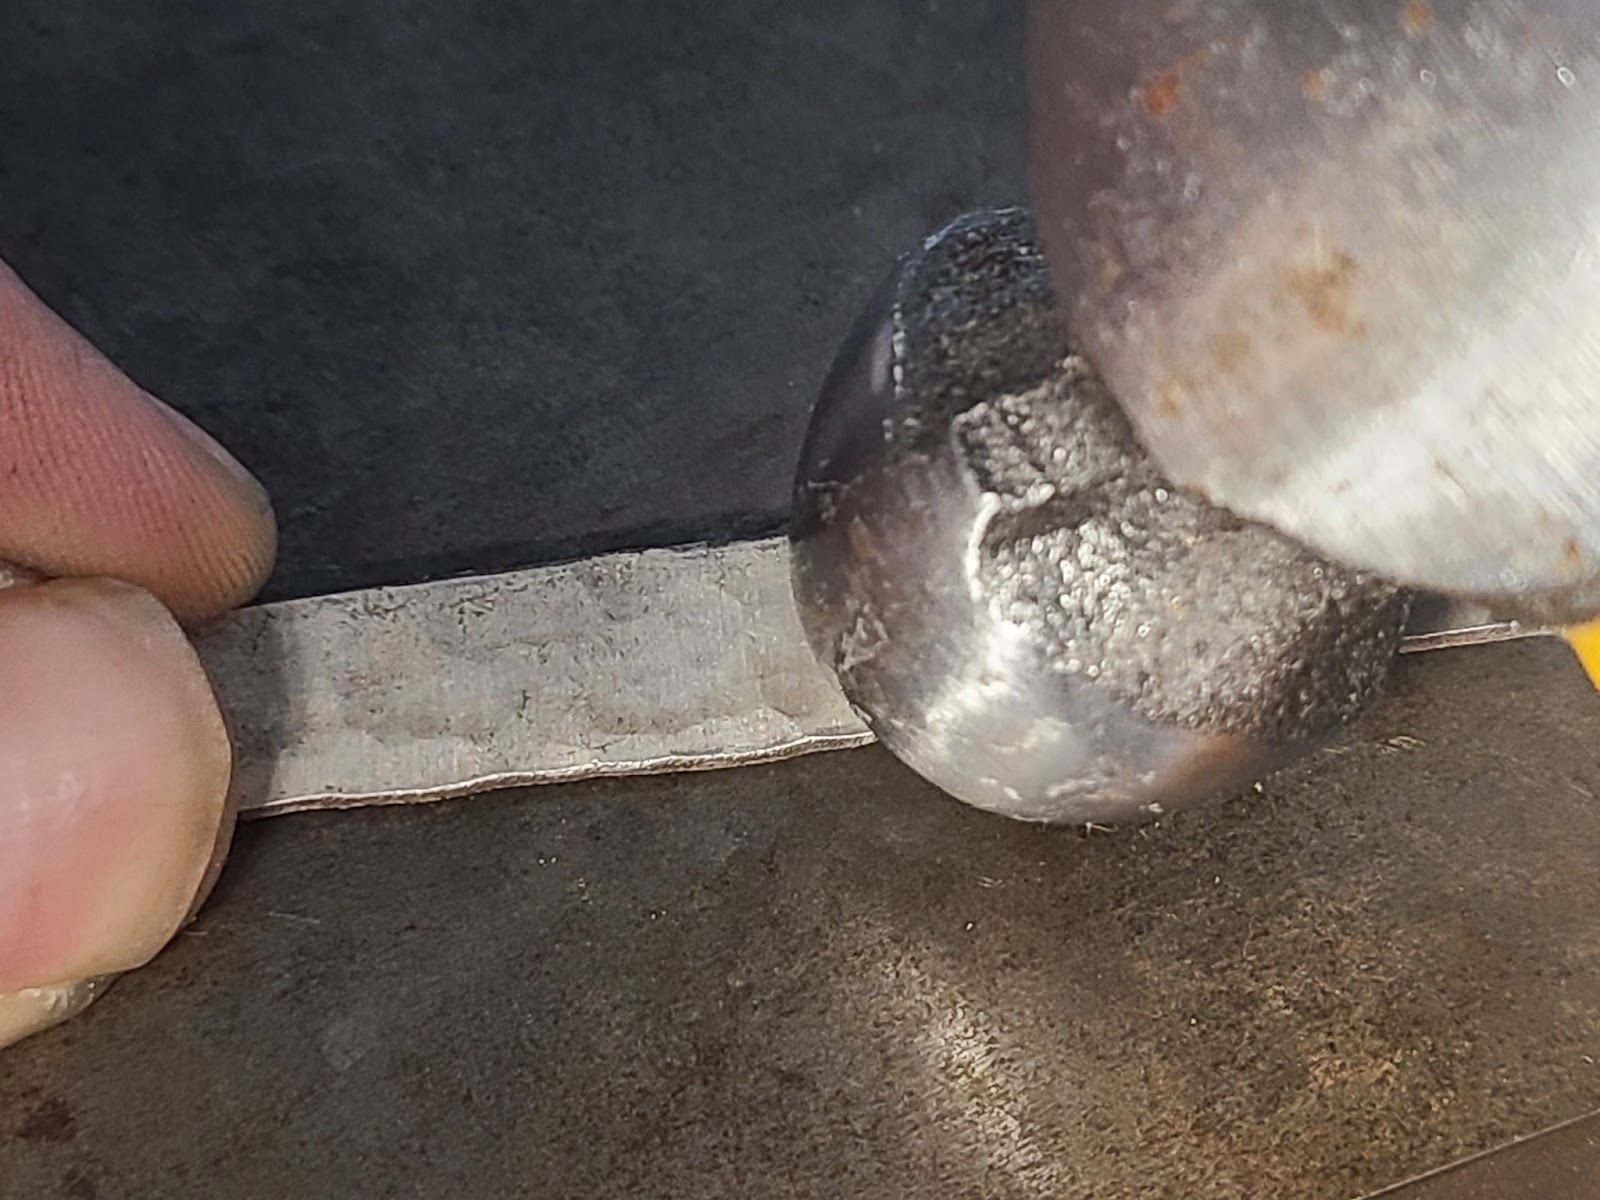
After flattening the piece and annealing, you’ll want to grab it sideways with your pliers. You’re going to take your hammer and repeatedly smack the silver on top to force it downwards. Your hits should be firm and decisive, but not swung out of control. You should feel a solid hit on each strike.
By keeping pressure on your pliers, you’ll force the metal to lengthen and thin. Flip the metal over every half dozen or so hits, flipping it on both axis. This helps keep it even.
After a bit, you’ll notice the metal kind of mushrooms over the edges. You want to catch this as quickly as possible.
When this happens, you should file off the lip and anneal the metal again. You can sometimes fix this and save material by hitting the ring on the top or bottom of the shank, but you should be careful.
Don’t just pound the metal back into the sides. As it thins, the lip will end up peeling off and it can take a good chunk of the ring with it.
You’ll also deal with cracking, most likely. Watch the edges of the metal carefully, when you see cracks begin to form on the corners you should anneal immediately and file. These form primarily from the silver being work hardened but high solder content or a melt that wasn’t fluxed to minimize oxides will both make it happen more quickly and drastically.
Every two or three passes in the pliers, you should anneal and do a full run along the length of the top and bottom of the ring. This will help even out the thickness of the metal and spread the metal just a bit further.
Anneal before and after you do this, don’t go into it when the metal is still work-hardened from hitting the sides. Don’t worry about minor surface cracking on the sides. Unless something is seriously peeling off you’ll be able to easily sand these out during the finish work stage.
You’ll want to measure the ring as you go on. A jeweler’s chart will help you figure out how long the ring needs to be for the size you’re working with. It’s hard to be exact with this process, but you’ll want to be as close as possible to the right size.
File the ends flat after the ingot has thinned down and reached almost the length you need. Measure from flat to flat for your final measurement. If the silver is still over 1mm-1.5mm thick, you may need to continue to draw it out and clip or saw it off on the end.
At that thickness, you’ll have a lot of trouble getting it around the mandrel.
Once you’ve reached it, we can move on to texturing.
Step 4 – Texturing the Ring (Optional)
This is an easy process. Hold the ring blank down to your stamping block and whack it with the ball end of your hammer.
You can also use the cross-peen on a goldsmithing hammer to create a different texture.
Be a bit cautious here. As you hit the silver, it will harden, and the ends will bow up. When it becomes warped you should stop hammering and anneal the blank again.
After you’ve finished, anneal your piece of work. It’s time to begin forming.
Step 5 – Forming the Ring
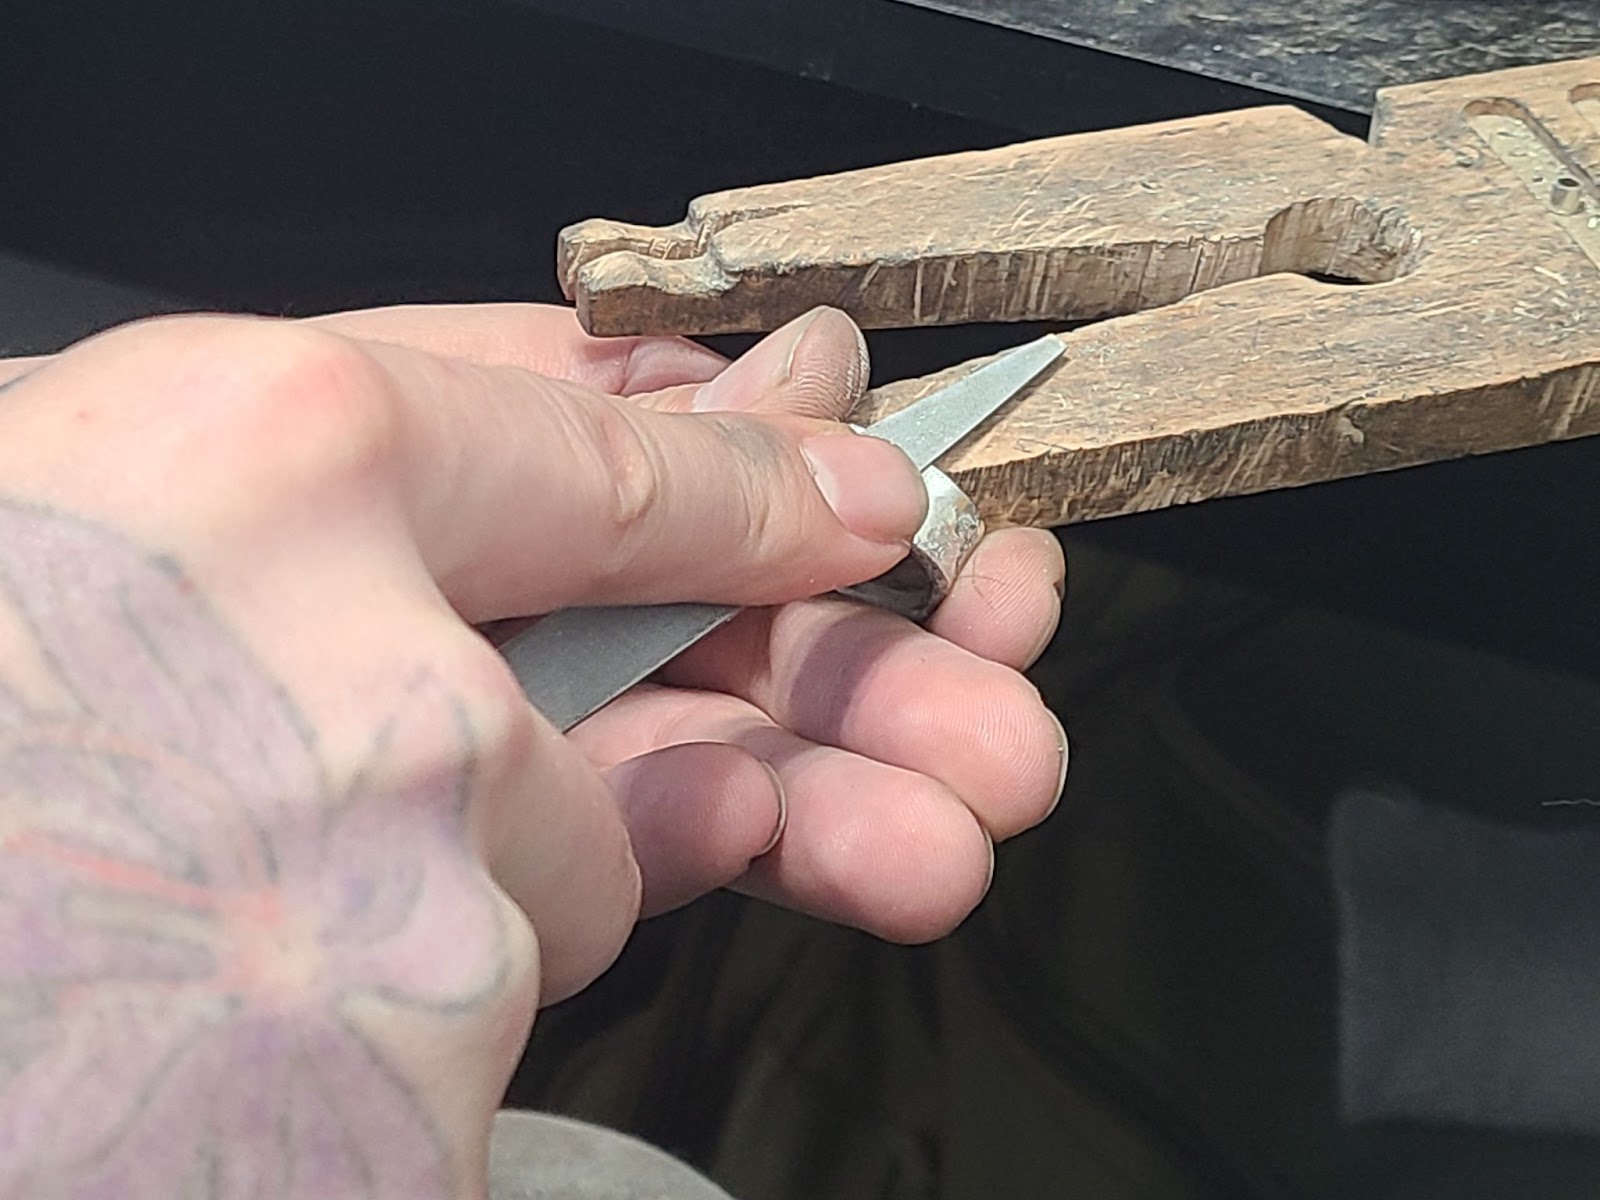
Before we get to whacking, we should prep the ends for soldering. A jeweler’s miter jig is the preferred route, but you can also make do with a bit of scrap wood that’s been cut at 45°.
Take one end of the ring with the textured side up and press it against the 45° scrap. The end should just barely protrude from the wood, enough to let you create a smooth 45° angle starting at one of the corners.
Flip the ring over, now textured side down, and repeat on the other end of the ring.
Now begins the fun. Take your ring blank and begin smacking it around the outside of the mandrel with a mallet to make it conform. You can use your hammer as well, but it’s more likely to leave marks.
If the ring stops moving, then you’ll want to anneal it again and get back to it.
Closing the final gap will be a giant pain. Trust me on that one. If you angled the pieces well earlier, they’ll close together almost seamlessly.
Since nothing ever works out according to plan, just try your best. We can force it before soldering if necessary.
Step 6 – Soldering
Soldering this ring will be the biggest challenge for a newbie. This isn’t just a simple attachment. It’s a complicated, learned skill that takes time to master.
The idea is simple: brush some flux onto the area, set a small chip of hard solder on there, and then heat the piece until the solder flows. Reality refuses to cooperate with this simple truth, unfortunately.
Silver solder works by moving into the pores of the metal and creating a tight bond while a liquid. It doesn’t fill in gaps. The better your angles on the ends of your ring, the easier this will be.
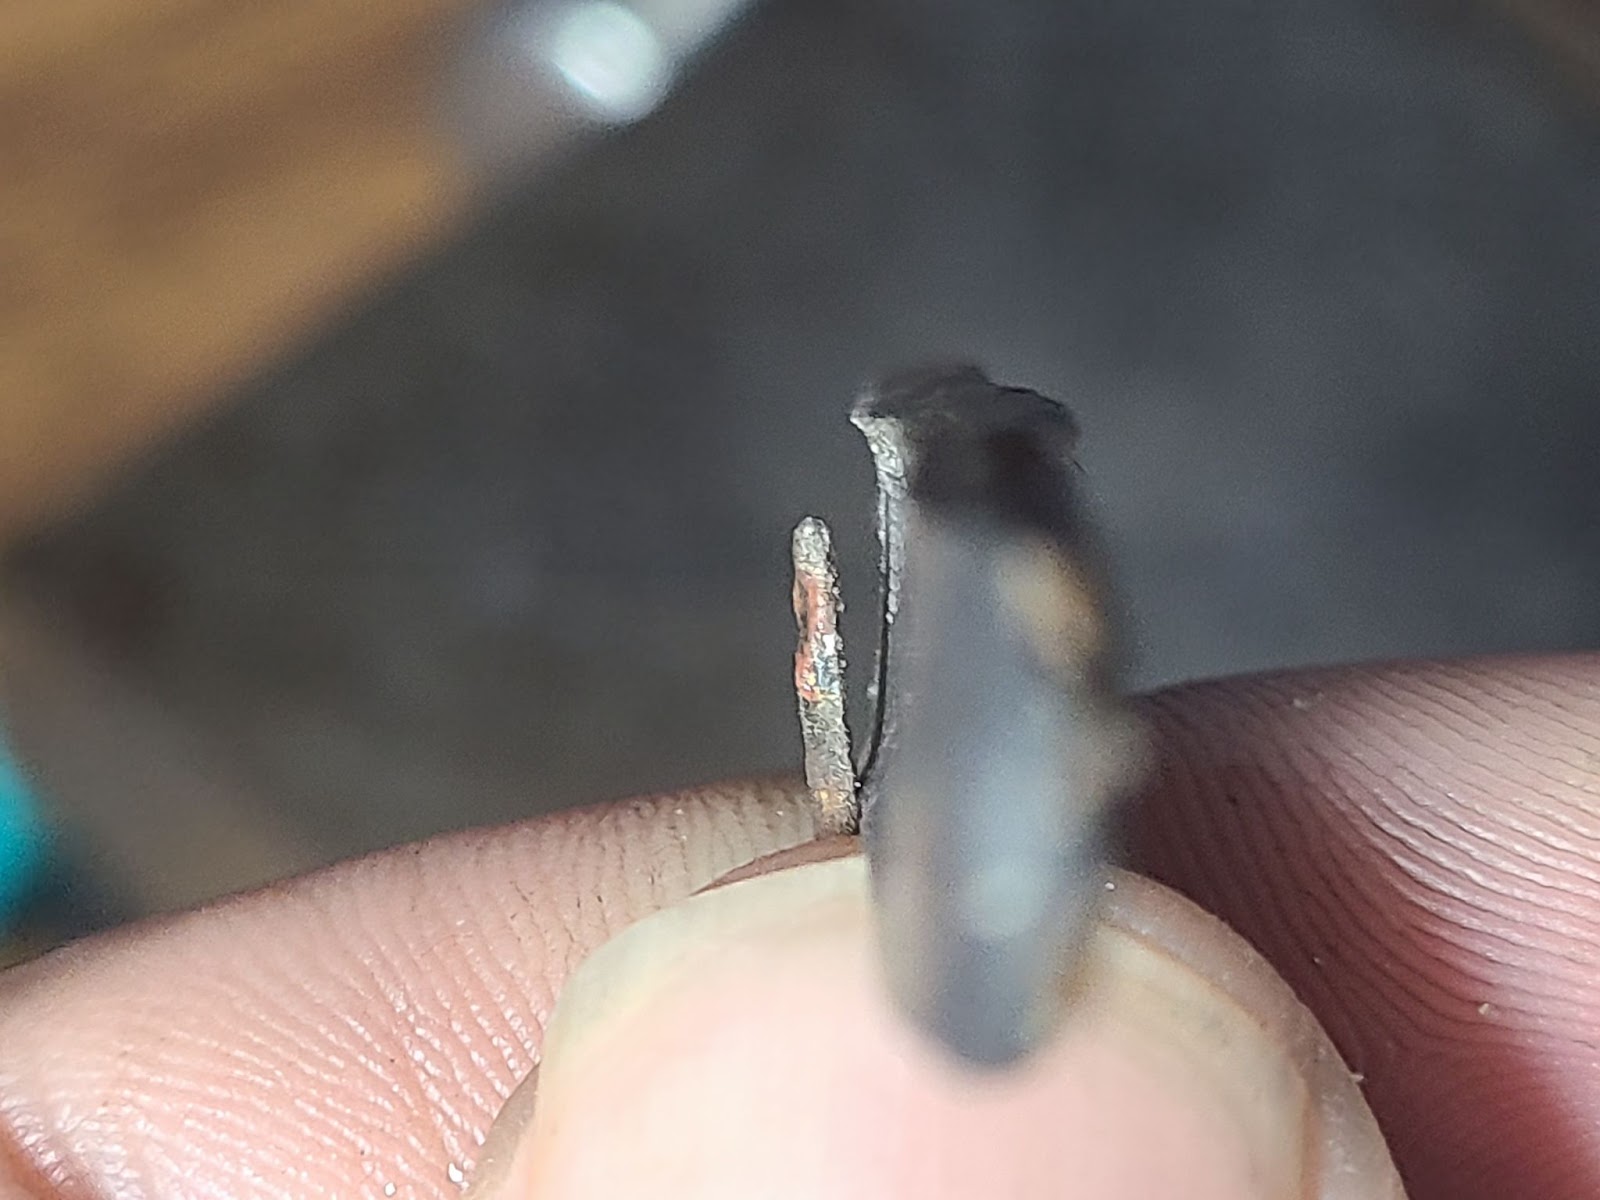
Place your solder on the ring like so:
Now, you need to heat the whole piece. The whole ring should be a uniform temperature to cause the solder to flow, you’ll see it go liquid and look like your molten silver earlier did. Hard solder flows at a temperature close to the melting point of your silver, it will be a bright-orange color when it flows.
Allow the ring to cool to black, and then quench it. Pull the ring and test the connection, I usually push and pull with my thumb and forefinger on opposite sides of the joint. If it breaks… it was going to snap soon anyways.
You’ll have to clean the connections up if the solder doesn’t hold. Silver solder won’t flow properly on oxidized metal. You can use pliers to pry the ring open a bit, sand the ends, and then close it again on the mandrel.
If this is your first time… it’s probably going to take a few tries. Don’t get discouraged!
The idea here, at least for a newbie, is just to get it connected. You can file down most gaps, and otherwise, make the ring look seamless during the finishing work.
If you absolutely can’t get it right, or you lack hard solder when you’re doing this, you can also carefully round the ends of the ring blank. This creates an “adjustable” ring band, but I don’t find it as fulfilling as actually soldering the ring together.
Step 7 – Finishing the Ring
At this stage, you’re pretty much done.
Test the ring on your finger, if the internal edge “bites” then you can use a needle file or rolled up bit of sandpaper to smooth the edges. I’ll usually soften the top edge as well, just for aesthetic reasons.
You’ll now finish the ring off with sandpaper and some form of polishing. If you have different grits of paper I recommend starting at 400 or so and then working up to at least 1200 grit by jumps of 200.
Sand with each grit until all previous scratches are removed, then go up. Your texture will start to fade if you sand for too long, and the low bits are going to remain unsanded. If you have a rotary tool, then silicone wheels will make this much easier.
If the ring is a bit too small, you can also force it about a half size up by beating it downwards on the mandrel. You’ll need to anneal it, so try and get it done before you’ve done the rest of the finishing work.
Finish it off with a silver polishing cloth, then set it down and admire your new ring.
There are a lot more adventures awaiting you if you choose to stick with silversmithing, but I think this ring is a great introduction!
- Online rock and mineral club for collectors of all levels!
- Find community with like-minded rock and mineral enthusiasts.
- Monthly Giveaways!
- Free Access to Entire Digital Library of Products (current and future products)*
