What Does Borax Do When Melting Silver?
Borax is often recommended as a bench staple, but what does it actually do? Well, it can be an essential component of your silver work, both for soldering and for melts.
Let’s jump right in and talk about what borax does for your melts, why it does it, and some other uses and alternative compounds!
Borax vs. Boric Acid
With the similarity of names, it’s easy to confuse borax with boric acid. Making things even more complicated is the fact that they’re both used in similar fashions.
They can be used more or less interchangeably in my experience. Many people prefer boric acid over borax for melts. The biggest (non-chemical) difference is that the majority of boric acid flux solutions come as a liquid instead of a paste or powder.
Put simply: borax is the sodium salt of boric acid. They do have slightly different properties when it comes to practical applications but I won’t be describing anything you can’t do with either in this article.
Both are corrosive and will eventually break down fire bricks, crucibles, and other things they come into contact with. Crucibles should be considered disposable for this reason, and you’ll want to limit contact between your borax and everything else.
One more thing before we get started: borax or boric acid fumes are hazardous and the chemicals are caustic. Use good ventilation, a face mask or respirator, and wash your hands thoroughly after working with either of them.
Reduced Oxidation During the Melt

The main reason that we introduce borax into a melt is to reduce oxidation. Oxidation is the enemy of anyone melting sterling silver, especially when the oxides bunch up internally and create voids.
These voids will appear as you work the silver out. Or rather, ideally you’ll just end up with a discolored pocket in your silver.
What happens most of the time is that the oxides trap a bit of air. The air expands when you heat the metal, creating blisters across the surface. That’s a bit problematic as you go in for the polish, to say the least.
These blisters don’t just sand out evenly. Once you’ve worked through the metal you’ll have a small pocket of air forming a hole. If you’re lucky the oxidized silver has a thick enough surface to smooth it out on the front and just leave a small blemish on the back.
If you’re unlucky and did a particularly bad melt, the blisters can actually pop. That’s good news if you like being showered with small bits of red hot metal, but bad news for the rest of us.
Anytime you’re working with your own scrap you should be watching the surface for blisters during heating.
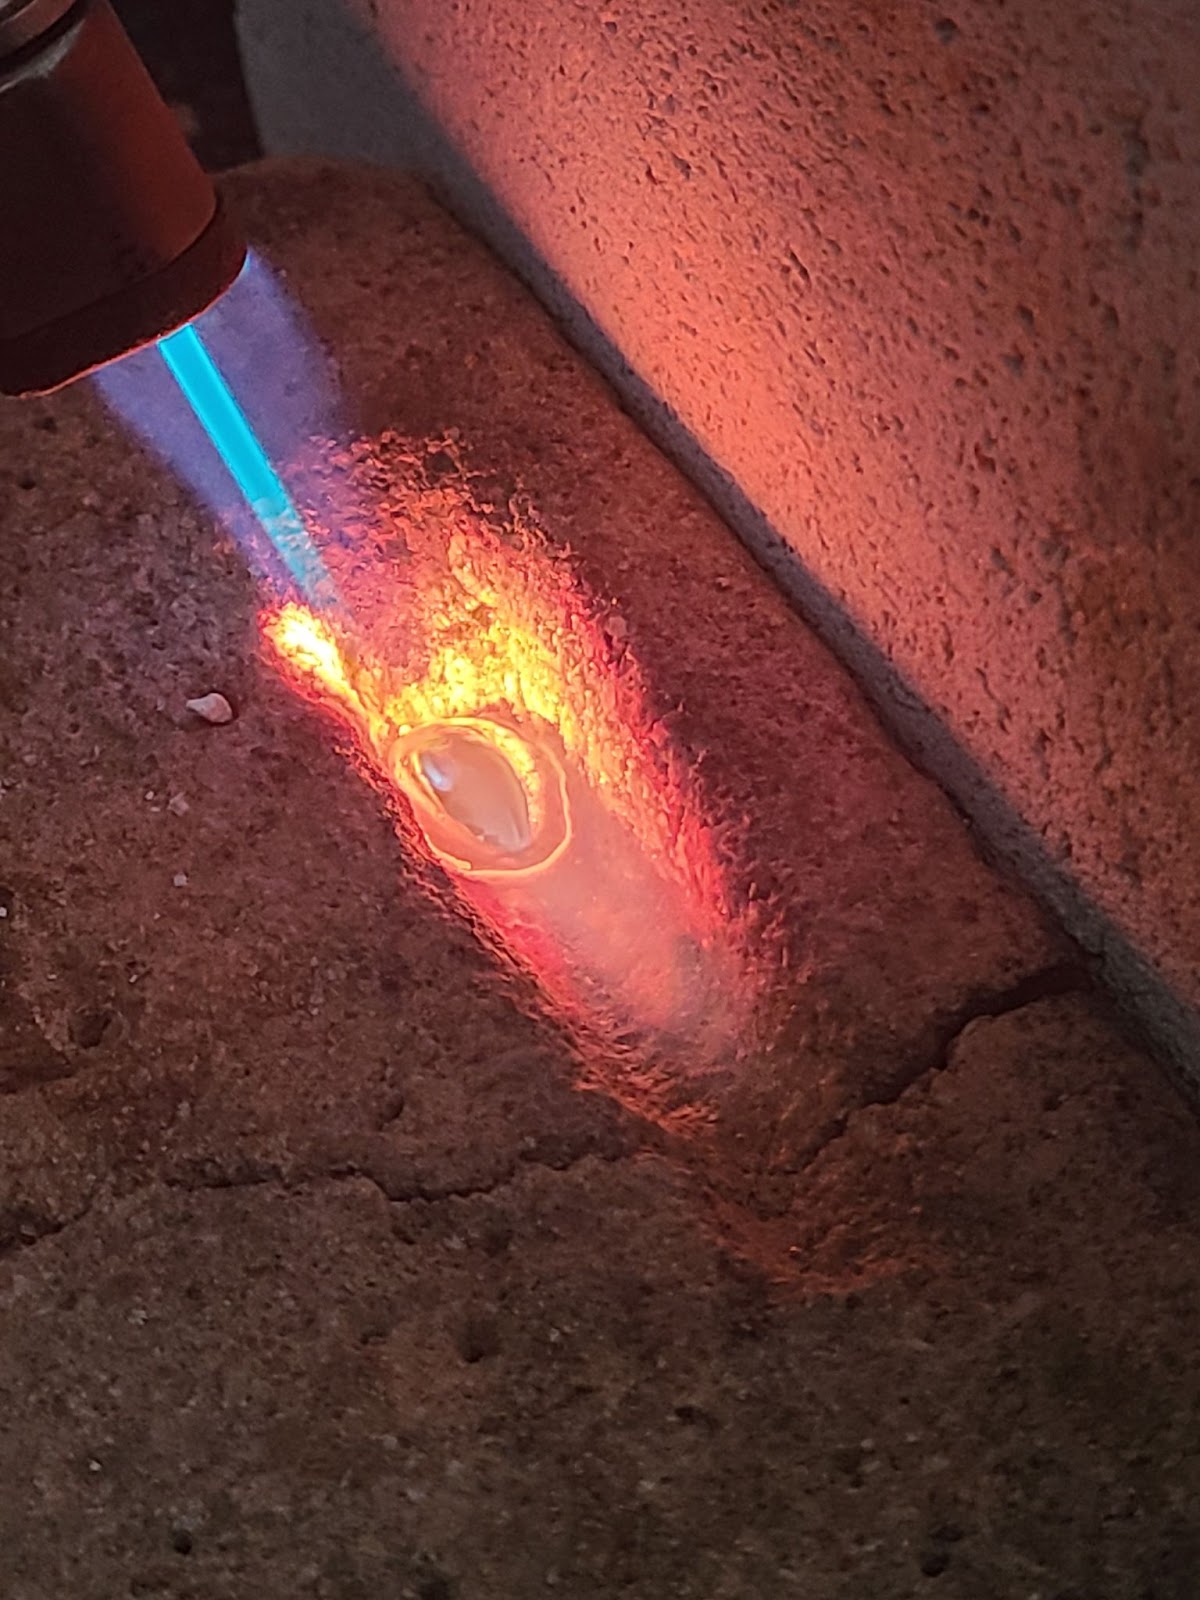
The blisters in the photo above are at risk of doing so. I actually heated the rough silver twice to raise the blisters and demonstrate, I avoided going in for the third round of heating, at this point, those blisters are a serious safety risk when heated.
You may also notice the rough edges. This is also caused by a melt with highly oxidized material and not adding flux. This material was cleaned up before photography with a 120 grit sanding wheel to highlight the blisters.
Borax melts and dissolves oxidized metals, although we usually think of it as preventing the formation of oxidation. By removing them from the equation, you can avoid nasty formations inside your ingot.
You can crumble and add borax directly to your melts. And you should, it helps a lot with your ingots. It’s doubly important if you’re not using a proper crucible, plenty of small-scale smiths melt in carved portions of fire brick or other improvised molds.
Fluxing during a melt is easy enough, but knowing when you need a bit more than normal is important.

Oxidized metal will often float on top of the melt, and it’s visible as dark stains across the surface. I slowly add borax or another flux into the mix until the top no longer has the stains pictured above.
You’ll get the hang of it! In-person the difference is much larger, but you get the basic idea. In both of those photos the metal is molten, but the oxide crust on the first makes it hard to photograph.
The important thing is to add enough to clear out the oxides, a bit of flux crystallizing on the exterior of your metal isn’t a problem.
How to Use Borax to Season a Crucible
Borax is frequently used to season crucibles. It forms a nice base layer for the metal to melt in and it kind of “floats” on the molten borax. This prevents the silver from picking up contaminants in the form of dust.
Metal contamination is a big deal. It leads to more work, structural failures, and even safety hazards. Fluxing your crucible helps prevent that.
Industry-standard is actually to mix 50/50 borax and boric acid by volume to create the glazed layer we’re looking for. You can use either, and we’ll focus on borax in a powdered form for demonstration.
It’s a simple process, just follow these directions:
- Place your crucible on a fire-safe surface.
- Measure out ¼ to ⅓ of your crucible’s total volume in powdered borax.
- Pre-heat the crucible with your torch.
- After a minute or so of torching, test the heat by dropping a pinch of borax in the crucible. It should melt into a glassy liquid immediately when you’ve reached the right temperature.
- Place the measured borax into the crucible.
- Maintain heat and roll the crucible in its holder along the edges. Use the torch to keep the bulk of the borax liquid while allowing it to glaze on the sides.
- Once the entire crucible is glazed you’re done. Keep rolling until all of it is solid to spread any excess out evenly or carefully pour the excess in a non-flammable container.
This is the first step in preparing a crucible for a melt. Without it, you’re going to make problems for yourself that could have been avoided.
Borax melts at 1,369°F (743°C) so this is the most practical way to do it at home. If you happen to have a furnace, you can just melt the borax in there and distribute it over the surface.
It’s a lot easier than having to do it with a torch, but most people don’t have one lying around.
- Online rock and mineral club for collectors of all levels!
- Find community with like-minded rock and mineral enthusiasts.
- Monthly Giveaways!
- Free Access to Entire Digital Library of Products (current and future products)*
