Flintknapping isn’t the easiest art form to get into, especially since most people don’t understand how technical it is. That said, there are a lot of things you can do to start working on your first couple of points without having to recreate lithic reduction technology from scratch.
So, let’s get into it with our guide to flintknapping for beginners, so that you can get started on your journey!
First Things First: Flint Knapping Tools
The first thing you’ll need is tools.
The process of knapping uses just a few low-tech tools, but it’s not quite as simple as it looks. You can make your own tools or purchase them, depending on what you prefer to do. If you’re a bit handy already, then making these tools is simple enough.
Tools can be broken down into two main categories. Percussion flakers and pressure flakers.
Percussion Flaking Tools
The first is percussion flaking tools. These are used for most of the larger work you’ll be doing. The general categories are hammerstones and boppers. Boppers can be made from copper or antler.
You’ll likely end up with a variety as time goes on. To start with, a fist-sized cobble of quartzite or another hard stone is great for breaking down larger nodules and a copper bopper is good for breaking out preforms.
Pressure Flaking Tools
Pressure flakers can be made with an antler tine or with a copper nail embedded in a handle of some sort. An “Ishi stick” is also used, which consists of a longer handle to allow for more pressure to be exerted when flaking.
Hand Pad
You’ll also need a hand pad, whether rubber, leather, or even multiple layers of tough fabric like denim. The latter works in a pinch but has a tendency to catch small needles.
Other Safety Equipment
And seriously, get some band-aids. You’re going to get cut when knapping, it’s virtually unavoidable. I keep a couple in my wallet since I tend to work on stuff for a half hour here and there. Most material slices clean, leading to a lot of blood but little pain, although the occasional irregular flake can cause lacerations instead.
Safety goggles and a mask are also must-haves. Virtually all knappable stone is some form of silica, whether amorphous like obsidian or microcrystalline like chert varieties. The dust can cause cumulative damage ending in silicosis, but working outdoors with an N95 will prevent you from breathing it in.
Sample Tool Set
I recently found myself with a surging interest in knapping again, but my tools were long gone for the most part. Since I live in a fairly remote area, I decided to just order a kit.
Specifically, I ordered this kit.
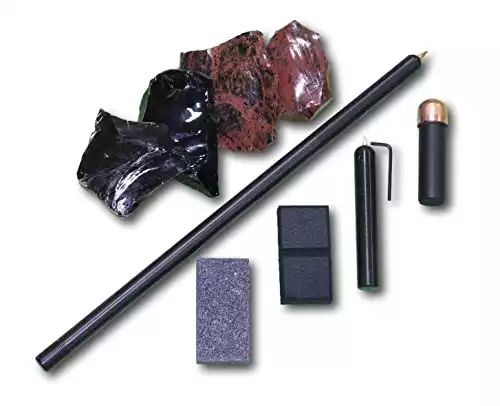
It’s a decent set, worth it just for the pressure flakers that it came with. The pressure flakers consist of copper nails with the heads cut off set into a handle and held in place by a hex screw. Since pressure flaker tips tend to wear down quickly, it’s a nice touch. The Ishi stick actually has a hole for the hex tool used to open them up so you won’t be stuck digging around for an Allen wrench when the time comes to change them.
The bopper is passable and will work for a beginner. It consists of a copper end cap on a wooden dowel. Solid copper is better for breaking down large nodules, but I made short work of 20 pounds of obsidian with it in a couple of sessions. The cap will eventually wear through, but it’ll last long enough to give you a good feel for them. Alternatively, order a copper billet along with the set for breaking down nodules.
While it’s not the best thing in the world, the notched rubber pad that comes with it is usable and tough. It’s just not the right tool for breaking down most larger stones. It can be done if you’re careful, but you won’t be able to wrap it around the end which means a cut is inevitable when you hit a platform wrong.
It also comes with a rough little brick for abrading which I’ll discuss below. I sometimes use it, sometimes I just use the concrete side of the steps depending on where I’m working.
It’s a good kit for beginners, but it’s also fairly basic. I recommend picking one up just for the pressure flaker and Ishi stick, which are great tools. The rest of the set is good but not great.
It also comes with a few bits of obsidian with a decent size, saving you some time on having to source material elsewhere.
Picking a Material and Sourcing It
For beginners, there are a few options to find material.
Find Your Own
Local stone is great, especially if you can regularly find it within walking distance. Just keep in mind that the various chert varieties may need heat treatment depending on the water content and the crystalline structure of the material.
Obsidian is my preferred material. It’s also surprisingly cheap, as long as you look in the right places. You can generally find it for a few bucks per pound on places like eBay, specifically if you’re looking for rough material. The further processed it is, the more it will cost.
Material meant for lapidary use is often more expensive, oddly enough, despite being about the same grade.
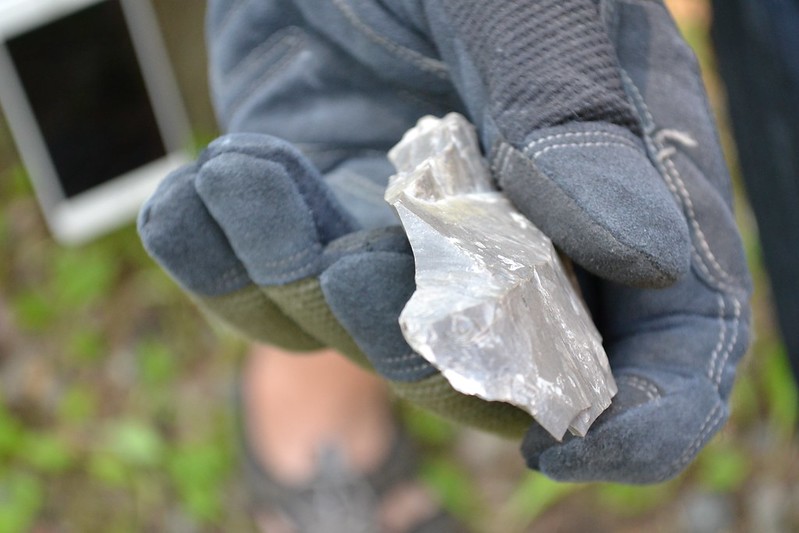
Cullet glass is also a good option if you prefer different colors. In this case, the term you want to use is “landscaping” which is what it’s generally sold for. It’s similar in cost to obsidian in most cases, and the material works about the same.
Buying Material
Keep note of who you buy from. Not only will they appreciate repeat business, but you’ll also find that a good seller will often provide much better material. Not all obsidian is created equal, and some of it can be full of voids and a bit crumbly. You want solid pieces of material.
This is less of an issue with cullet glass, although slag from smelting can vary quite a bit in quality.
How Much Material Do You Need?
I recommend getting 20 pounds or so of material to start with. Don’t worry about how many points you’ll get from it, you’re going to break a lot of rock before you get your first good point. Just find something cheap and easy to access to begin the learning process.
Let’s Talk About Conchoidal Fractures
The entire process of flintknapping relies on working with conchoidal fractures. Without them, the whole process really doesn’t work and you’d be stuck with pecking methods.
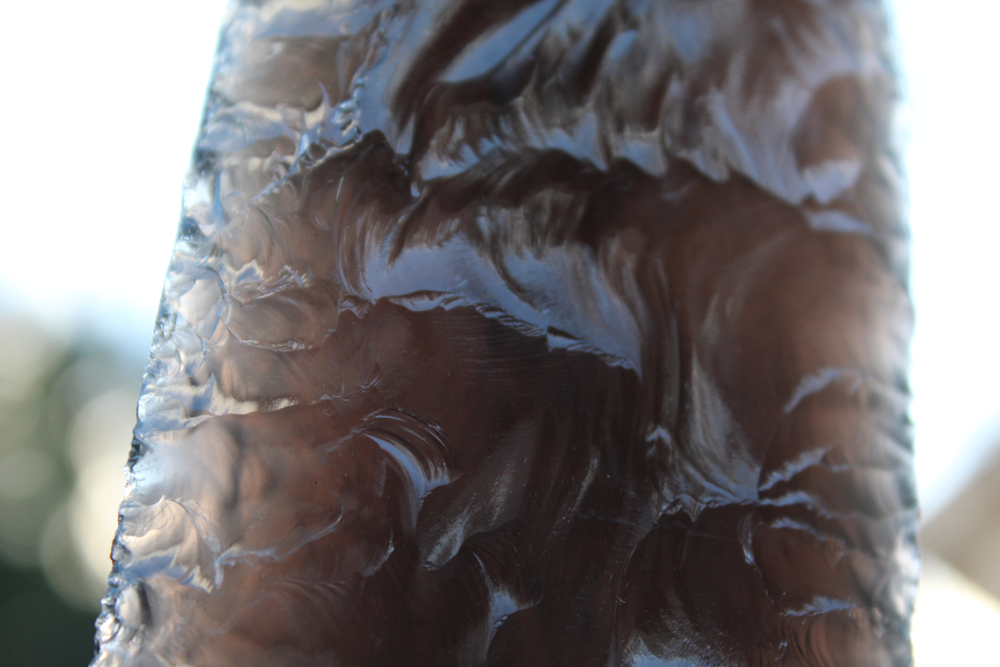
A conchoidal fracture is a cone-shaped breakage, generally with wave-like undulations. This is common in glass and microcrystalline silica types. They emerge from the point where a stone is struck, creating a repeatable process. While they can seem uncontrollable at first, they’re actually rather predictable once you get the hang of it.
Conchoidal fractures are what allow for the sharp edges of stone tools. The cones create a very thin edge, to the point that obsidian can even bear a monoatomic edge. When repeated in small patterns you end up with an incredibly sharp, serrated edge.
In order to reliably produce a flake from material you’ll need accuracy and consistent force. That said, you can’t just start bashing a rock and hope it works out in your favor. There are, instead, some basic rules to the process.
Platforms and Ridges
Platforms are where you use your bopper or pressure flaker to remove a piece of material.
There are a couple of main rules to hitting platforms and getting a predictable result:
- All platforms must be below the centerline of the stone. If they’re above it, the rock is more likely to simply break than for a flake to be removed.
- Platforms need to be strong enough to take the hit without crumbling, thicker platforms will remove larger flakes.
- Flakes will generally follow ridges in the material when removed, you should use this to your advantage as often as possible.
- Flakes will terminate when reaching a concave area, which may result in a “step fracture” which is a 90° break instead of a smooth termination of the flake.
Setting Up Platforms is Key To Success
This is where things get complicated. You’ll develop a feel for this fairly quickly, but without knowledge of the basics you’re looking at an absurd amount of trial-and-error to get down the basics.
The first point: if you hit above the centerline you risk breaking your stone. These will generally be a clean break, just snapping your potential blade or point in half and essentially ending your project.
So your platform needs to be below the centerline. But not too low, or you’ll run into a problem with shallow flakes or crumbling.
It’s important to note when knapping setting up your platforms is your key to success. It sometimes looks like experienced knappers in videos simply break the stone apart, almost at random, to shape it. But the truth is that there’s a lot of experience there, taking it slow in the beginning will help avoid fractures and teach you what you need to know.
Platforms can be thick or thin, but their depth will also affect the amount of material removed. You also need to take into account the curve on the other side, since a concave portion can cause a flak to terminate, while convex flakes are often much easier to remove.
Precision can be frustrating at first, especially since the tools used tend to be a bit less precise than normal hammers that we’re used to. At least when you’re first getting started.
In order to drive farther flakes, especially during pressure flaking, it’s important to pay attention to the edges of previous flakes. When you can make sure you have a couple of spots that are lower than the edges of the platform you’re working you can more reliably drive a flake.
It’s important to remember something else: knapping is low-tech, but it’s a constant process of problem-solving. You’re essentially working platforms the whole time.
So you need to pay attention to angles, depth, and fragility of the edges of the material when working with them. It’s a hard process to describe, but if you follow the above guidelines the rest will become apparent with a little bit of time.
Abrade, Abrade, Abrade
Abrasion is a key to getting good flakes.
You don’t necessarily need anything special. A bit of sandstone or even the sidewalk is hard enough to abrade most of these materials.
There are two main types of abrasion you’ll use.
When pressure flaking, it’s often a good idea to give the edge of the stone a few quick swipes. This will remove micro-flakes and get the platform back far enough that it’ll be easier to work with and won’t just crumble when you bring the tool into use.
You can also abrade to refine preforms. It’s time intensive to actually change the shape of the stone or bit of glass, but it can help shorten the process to do a bit of grinding in between passes to refine the exterior shape of the piece.
It’s easy to forget, but it’s one of the big things that will help advance your skills more quickly.
When to Use Percussion and Pressure Flaking
After spalling, which is removing flakes from the original nodule, you’ll need to figure out which type of flaking to use. Percussion vs pressure flaking.
Percussion Flaking
Percussion flaking should be performed almost until the end of the process for most projects. It removes larger flakes and makes it easier to thin out the workpiece. Essentially, if there’s significant thickness you’ll have an easier time removing it with a billet than a pressure flaker.
Percussion is pretty straightforward. Smack the platform with your billet, making sure to strike below the centerline. If you strike above it, the piece is likely to break.
Pressure Flaking
Pressure flaking is a bit different. Generally you take the point of your tool and press it inwards on the platform, then move the workpiece to remove the flake. It takes a bit of time to figure it out, and don’t be surprised if you’re removing shallow flakes that lead to very thick edges that are hard to impossible to pressure flake after a couple of times.
In that case, your best bet is to isolate the platform, abrade, and then use a percussion flaking tool to thin out the edge again.
Your goal is to remove larger flakes during this process. Quite often, when percussion flaking, you may overshoot the other edge of the piece, which isn’t always desirable.
Moving On To Pressure Flaking Too Soon
Many people make the mistake of switching to pressure flaking too early in the process. It’s important to note that you’ll generally get a smaller point than you think from the initial spall you’re working on until you get used to the process.
Pressure flaking, on the other hand, should be used primarily for refining the shape when the piece is done. You’ll generally want to do it in “passes” where you take one side of your preform and work it before you flip it over.
Switch to pressure flaking when you have the piece you’re working thin enough that you won’t need to really work at thinning out the piece too much. The only real shaping done via pressure flaking is going to be notching points or when working with eccentrics.
In general, points intended for hunting use should be as thin as possible. Those intended for decorative purposes can be thicker, making them less fragile for wear.
This is another part of knapping where your experience will guide you. But once you’ve learned the difference, you’ll begin to move much faster in the process.
Where Learn More About Flint Knapping
One of the best places you can go to learn the step-by-step process of flint knapping is the PaleoJim Youtube channel. Below is the first video of his 7 video series of flint knapping for beginners.
