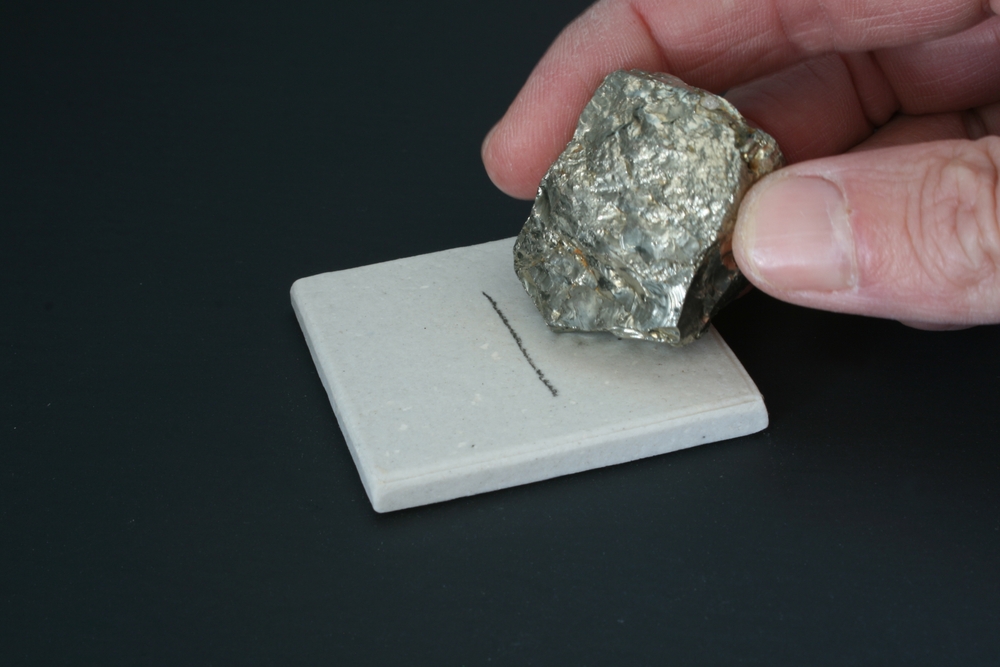
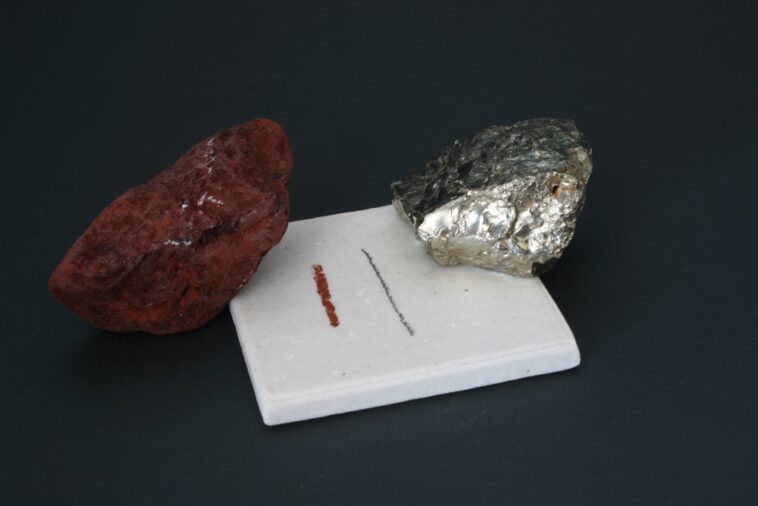
When you run a mineral over an unglazed porcelain plate, you get a good, old-fashioned streak test. It’s like a mineral’s signature. Take a chunk of pyrite, for instance; it’ll leave a black line behind. On the flip side, rhodochrosite goes the subtle route and leaves a white trace. White streaks are pretty common, so for a clearer look, some rock hounds switch to a black plate. It’s a simple way to see those tiny particles that tell you a lot about what’s in your hand.
Understanding the Streak Test
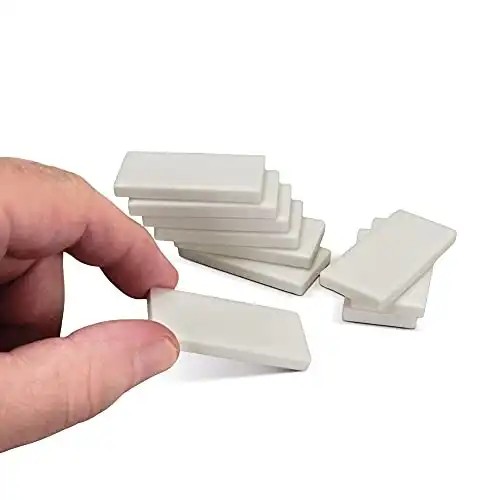
The streak test is pretty straightforward—you need a streak plate, which is essentially just a piece of unglazed porcelain tile. Run your mineral across it, and it’ll leave behind a trail of powdered mineral. Now, that powder isn’t just randomly colored; it’s a clue to identifying your mineral because the streak usually stays the same color no matter what the specimen looks like.
What colors might you expect? If you rub augite across the plate, expect a white to greenish-gray streak, or maybe even some brittle fragments if you press too hard. Love the blues? A stroke of azurite will give you a delightful light blue powder. Checking out something that looks like gold? Streak it to see a metallic yellow mark and reveal if you’ve struck gold, quite literally, or if it’s just fool’s gold (pyrite which leaves a black streak).
Curious about what other streaks you may encounter? Here’s a quick list for you to skim through:
- Andalusite: You’re looking at white or colorless, quite similar to the plate itself.
- Hematite: Watch out for a red to reddish-brown color, giving you a hint of its iron content.
- Garnet, Diamond, or Corundum: These are tough on the plate and leave behind a colorless streak.
- Limonite: This one’s easy to remember with its yellowish-brown streak.
- Graphite: That’s going to leave a telltale black streak.
- Malachite: Check out the beautiful green it leaves behind.
- Magnetite: Expect a black streak, kind of like what Magnetite looks like in hand.
Streak Won’t Work on Harder Minerals
Some minerals are more cooperative than others when doing a streak test. If you come across something like kyanite, the streak could differ depending on the direction you scratch because of its unique hardness. Some harder minerals that match the hardness to the plate, may just scratch the plate, crumble or leave residue that’s the same color as the mineral itself.
Here’s something worth noting: If the mineral is harder than the streak plate, you won’t get a streak, leaving you to rely on other tests to figure out your mystery mineral’s identity. Common find’s like quartz or topaz won’t leave a colored trace, so don’t be taken aback if you seem to get no results.
There’s also the odd chance of minerals shedding their skin, like fuchsite leaving glimmers of green mica flakes or olivine bidding goodbye to tiny granules. It’s all part of the process, showing you the diverse behaviors of minerals against a humble porcelain plate.
All in all, the streak test is a cool trick to have up your sleeve when you’re playing mineral detective. So grab a streak plate and start scratching—there’s a whole palette of colors just waiting to reveal the true nature of the minerals you find. Just remember, the streak never lies, even if the mineral’s outward color tries to trick you.
Performing a Streak Test

To carry out a streak test effectively, ensure your mineral sample is clean and freshly fractured to prevent skewed results from exterior films or tarnish. Here’s a quick guide on the process:
- Clean the Specimen: Make sure your mineral is free from contaminants for accurate results.
- Hold the Mineral: Grasp the mineral with your dominant hand and find a sharp edge or point for testing.
- Stabilize the Streak Plate: With your other hand, place a streak plate firmly on a level surface to avoid slippage.
- Apply Pressure: Press the chosen point of the mineral specimen against the streak plate.
- Drag the Sample: Slide the mineral across the plate with consistent pressure to create a mark.
- Inspect the Streak: Look at the mark you’ve made. You’re looking for a powdered line—evaluate its color and texture.
Remember, the color of the streak might differ from the color of the mineral itself. It’s the powdered debris left behind that matters!
Don’t Be Afraid To Apply Pressure
To get a proper streak test result:
- Apply pressure: A gentle swipe won’t do—get firm.
- Be determined: Some minerals demand a bit more elbow grease to powder up.
- No light rubs; you need to mean it!
Don’t Be Fooled!
When you’re inspecting minerals, your sleuthing skills matter. Check out these pointers to ensure your streak test isn’t leading you astray.
Use Untouched Surfaces: Don’t trust weathered surfaces—they’re deceiving. These surfaces might be coated with different substances, altering the streak’s true color. When in doubt, break for a clean slate—test a new, fresh surface if you can.
Compete a Double Check: Run your streak test more than once. Try different areas of your sample or use similar pieces for a solid confirmation.
Watch Out For Imposters: Some samples might be dressed in contaminants. For instance, instead of showing its true white streak, bauxite can get a pink hue from pesky iron stains.
Mind the Material: If your mineral is more fragile or comes in grains, it won’t streak like others. Instead, you might just find some grainy leftovers. Feel the texture between your fingers—if a smooth powder whispers across your fingertips, you’ve got your streak. If it’s more like sandy grit, you’re just feeling fragments.
Know Your Plate’s Limits: Remember that streak plates aren’t invincible—they range around 6.5 to 7 on the Mohs scale. Some minerals are the playground bullies, too tough for the plate and leave no trace. Instead, they either scratch it or break apart. These tough guys essentially have “invisible” streaks.
Trust But Verify: If the streak test results puzzle you, don’t stake your claim on them. It’s a clue, not the conclusive evidence in your mineral mystery. Dive deeper and look at other properties to narrow down your mineral’s true identity.
In this game of nature’s treasures, the streak test is one of your many detective tools. Keep these tips in mind and your mineral identification will be on solid ground.
Renewing and Reusing Your Streak Plate
When your streak plate looks like it’s seen better days, laden with lines and powdered residue, it’s time for a spruce up. Grab some water and a 220-grit wet/dry sandpaper—aluminum oxide or silicon carbide varieties are your friends here since their tough granules will get your plate back to smooth glory. Remember to sand under a trickle of water; it keeps the dust at bay.
- Materials Needed:
- Water
- 220 grit wet/dry sandpaper (preferably aluminum oxide or silicon carbide)
- Cleaning Steps:
- Moisten the streak plate with water.
- Sand the plate in a circular motion.
- Rinse off any remaining debris.
Alternative Applications for Streak Plates
Apart from their common role in the streak test, streak plates offer several additional practicalities. When you need just a bit of mineral powder, the streak plate is handy. For example, distinguishing calcite from dolomite during an acid test is easier when dolomite is powdered on a streak plate. Just powder your sample on the plate and add some diluted hydrochloric acid directly to it. If you’re using a black streak plate, the powdered white dolomite and its reaction are more visible.
Some minerals even give off a scent when crushed or turned into powder. If you happen to scrape sphalerite across a streak plate, you might notice a sulfur-like smell, which is a convenient way to identify it.
You’ll also uncover other clues to a mineral’s characteristics during the streak test.
Minerals that are tougher than the streak plate won’t leave a mark, revealing their greater hardness.
With a bit of practice, you can learn to guess a mineral’s hardness based on the effort it takes to scratch the plate. Pay attention to the nuances: olivine often showcases its grainy texture, augite readily displays its splintery fracture patterns, and black tourmaline might crumble, indicating its fragility. So remember, when using the streak plate to check color, keep your eyes open for these additional details.
Streak Colors of Common Minerals
| Mineral | Streak Color |
|---|---|
| Andalusite | White or colorless (hardness is about the same as the streak plate) |
| Anhydrite | White |
| Apatite | White |
| Arsenopyrite | Dark grayish black |
| Augite | White to greenish gray |
| Azurite | Light blue |
| Barite | White |
| Bauxite | White |
| Benitoite | White |
| Beryl | Colorless (harder than the streak plate) |
| Biotite | White to gray (don’t be deceived by flakes) |
| Bornite | Grayish black |
| Calcite | White |
| Cassiterite | Colorless |
| Chalcocite | Grayish black |
| Chalcopyrite | Greenish black |
| Chlorite | Greenish to greenish-black to white |
| Chromite | Dark brown |
| Chrysoberyl | Colorless (harder than the streak plate) |
| Cinnabar | Red |
| Clinozoisite | White |
| Copper | Metallic copper red |
| Cordierite | Colorless (harder than the streak plate) |
| Corundum | Colorless (harder than the streak plate) |
| Cuprite | Brownish red |
| Diamond | Colorless (harder than the streak plate) |
| Diopside | White to light green |
| Dolomite | White |
| Enstatite | White to gray |
| Epidote | White or colorless (about the same hardness as the streak plate) |
| Euclase | White or colorless (when harder than the streak plate) |
| Fluorite | White |
| Fuchsite | White (often sheds tiny green mica flakes) |
| Galena | Lead gray to black |
| Garnet | Colorless (harder than the streak plate) |
| Glauconite | Dull green |
| Gold | Metallic gold yellow |
| Graphite | Black |
| Gypsum | White |
| Halite | White |
| Hematite | Red to reddish brown |
| Hornblende | White |
| Ilmenite | Black |
| Jadeite | Colorless (harder than the streak plate) |
| Kyanite | White or colorless (about the same hardness as the streak plate in one direction) |
| Limonite | Yellowish brown |
| Magnesite | White |
| Magnetite | Black |
| Malachite | Green |
| Marcasite | Grayish Black |
| Molybdenite | Bluish gray, gray |
| Monazite | White |
| Muscovite | White, often sheds tiny cleavage flakes |
| Nepheline | White |
| Nephrite | Colorless (harder than the streak plate) |
| Olivine | White or colorless (about the same hardness as the streak plate) |
| Orthoclase | White |
| Plagioclase | White |
| Prehnite | White |
| Pyrite | Greenish black to brownish black |
| Pyrophyllite | White |
| Pyrrhotite | Grayish black |
| Quartz | Colorless (harder than the streak plate) |
| Rhodochrosite | White |
| Rhodonite | White |
| Rutile | Pale brown |
| Scapolite | White |
| Serpentine | White |
| Siderite | White, very light brown |
| Sillimanite | White or colorless (about the same hardness as the streak plate) |
| Silver | Silvery white |
| Sodalite | White or light blue |
| Sphalerite | White to yellowish brown, often with an odor of sulfur |
| Spinel | Colorless (harder than the streak plate) |
| Spodumene | White or colorless (about the same hardness as the streak plate) |
| Staurolite | Colorless (harder than the streak plate) |
| Sulfur | Yellow |
| Sylvite | White |
| Talc | White to pale green |
| Titanite | White |
| Topaz | Colorless (harder than the streak plate) |
| Tourmaline | Colorless (harder than the streak plate). Specimens often fracture, shedding small particles |
| Turquoise | White, greenish, bluish |
| Uraninite | Brownish black, grayish |
| Vanadinite | Pale yellow to yellowish brown |
| Witherite | White |
| Wollastonite | White |
| Zircon | Colorless (harder than the streak plate) |
| Zoisite | White |


