Lapidary Tips for Working With Fire Agate
Fire agate is a gemstone known for its vibrant colors and intricate layers, making it a favorite among lapidary enthusiasts. However, cutting and polishing this stone requires precision and patience. This guide will walk you through the process, ensuring you preserve the stone’s natural fire and maximize its beauty.
Checklist
Step Checklist
Selecting Your Stone
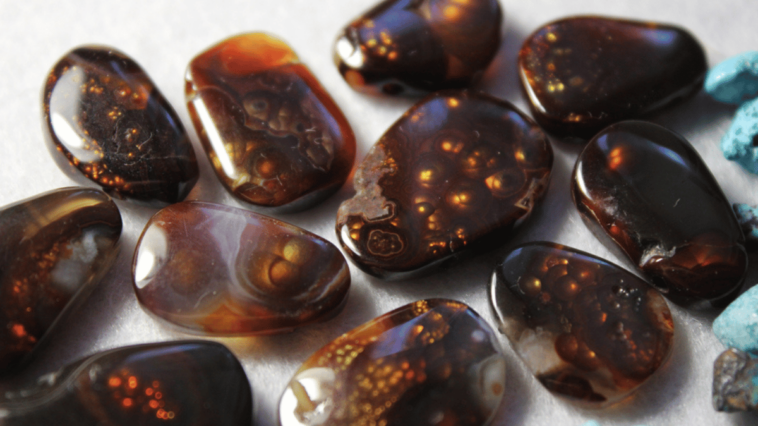
Tip: Look for the most solid pieces with visible layers of color.
- Quick Polish Test: Rub a small area to gauge the depth of color layers.
- Avoid Flattening Spheres: These can indicate the presence of color and fire.
Cutting Techniques
Objective: Cut the agate without compromising the layers of color.
- En Cabochon Approach: Carefully remove excess material to reveal the iron oxide layers.
- Dome Consideration: Opt for a low dome to avoid cutting into the color spheres.
Polishing Tips
Goal: Achieve a high shine without damaging the stone.
- Cerium Oxide: Recommended for a final polish.
- Diamond Paste: Better for detailed work on carved pieces.
Grinding Advice
Method: Slow and steady to prevent stone damage.
- Grind Intervals: Remove the stone from the wheel every 2-3 seconds.
- Grit Wheel Guide: Start with a 120-220 grit wheel, then move to a 600-800 mid-grit wheel.
Carving vs. Cabbing
Key Difference: Carving allows for more fire preservation.
- Diamond Burrs: Use these to delicately remove layers, approaching the fire.
Tool Recommendations
Investment Tip: A Foredom LX is more suitable than a Dremel for frequent cutting.
Safety Tips
Always wear safety goggles and a dust mask to protect from stone particles.
Troubleshooting Guide
Cracking: Overheating can cause this. Dip the stone in water periodically to cool it down.
Grit Size Chart
| Grit Size | Use Case |
|---|---|
| 120-220 | Initial grinding to shape the stone |
| 600-800 | Smoothing the stone before final polishing |
Supplies List
- Fire agate rough
- Grinding wheel
- Polishing compounds (Cerium Oxide, Diamond Paste)
- Diamond burrs
- Foredom LX or similar quality flex shaft tool
- Safety goggles and dust mask
A Deeper Dive Into The Tips Mentioned Above
Fire agate requires a soft touch and careful work in order to bring out the best color in the stone.
It starts with the selection of the stone you’ll be cutting.
Fire agate can be hard to read. I recommend simply finding the most solid pieces in what you have to begin with.
You’ll want to figure out how deep the layers of color are. You can do this by quickly polishing a window on one side of the material. Try not to flatten out any of the spheres of material that extend from the piece. You can usually find somewhere else to take a peek.
You can cut fire agate en cabochon. If that’s your aim then you’ll want to carefully remove chalcedony until you find the iron oxide bubbles and then figure out the best orientation. If you cut through that thin layer of goethite or limonite… you now have an orange or white agate instead of a fire agate.
Most of the time it’s best to go with a very low dome on cabochons made from fire agate. Even flat with slightly rounded edges can work. The key is to not cut into any of the spheres contained in the colorless chalcedony.
When working fire agate keep the following in mind:
- Terrible pieces of matrix can hide great stone, the exterior “rind” of the agate doesn’t matter much.
- Grind slowly. Take the stone off of the grinding wheel or pull back the flex shaft every 2-3 seconds. You’ll know you’re doing it right when you’ve spent more time looking than grinding.
- Grind with a higher grit wheel than normal if you can. Something in the 120 to 220 range is ideal but don’t run it on the stone for more than a few seconds at a time. Take it to a mid-grit wheel in the 600-800 range next.
- Cerium oxide is my polish of choice for any sort of agate. However, a diamond paste is often easier to use for carved fire agates. Work through your usual steps.
- Be wary of overheating the material, it’s easy to get caught up in carving. If you do overheat the piece it’ll crack, so make sure to periodically dip it in water if you’re using a Dremel of flex shaft to work on it.
- On that note: carving fire agate is a precision process. I love Dremels, but they’re really not cut out for this. If you’ll be cutting frequently it’ll be worth it to invest in something like a Foredom LX is worth the price.
To preserve the value of your fire agate you need to keep the fire. You can keep a lot more if you carve the stone instead of choosing to cut cabochons from it.
Carving is different from cabbing. Very different in this case.
Using diamond burrs you’ll want to slowly cut into the stone, removing chalcedony layer by layer. The general idea is to get as close to the layers of fire as possible, you’re trying to cut out the “mass” in the center of the stone.
Be very careful when carving, it’s extremely easy to cut through the layers of fire in the stone. You should be fine if you take your time and allow yourself some wiggle room when removing the clear chalcedony.
While carving fire agate is challenging, the results are undeniably rewarding. By following these steps and tips, you can transform a rough stone into a polished gem with preserved fire, ready to be set into jewelry or added to a collection.
